- Creating a fork
- Repository mirroring
- Merging upstream
- Removing a fork relationship
- Create a fork with the fork project form
Project forking workflow
Whenever possible, it’s recommended to work in a common Git repository and use branching strategies to manage your work. However, if you do not have write access for the repository you want to contribute to, you can create a fork.
A fork is a personal copy of the repository and all its branches, which you create in a namespace of your choice. This way you can make changes in your own fork and submit them through a merge request to the repository you don’t have access to.
Creating a fork
To fork an existing project in GitLab:
-
On the project’s home page, in the top right, click Fork.
-
Select the project to fork to:
-
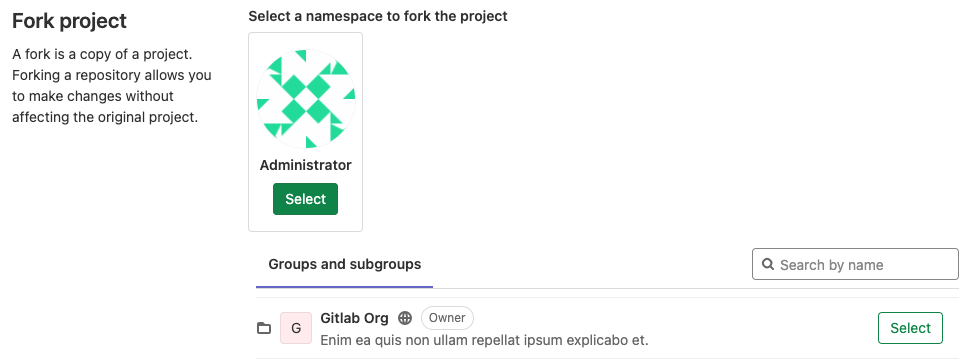
(Recommended method) Below Select a namespace to fork the project, identify the project you want to fork to, and click Select. Only namespaces you have Developer and higher permissions for are shown.
-
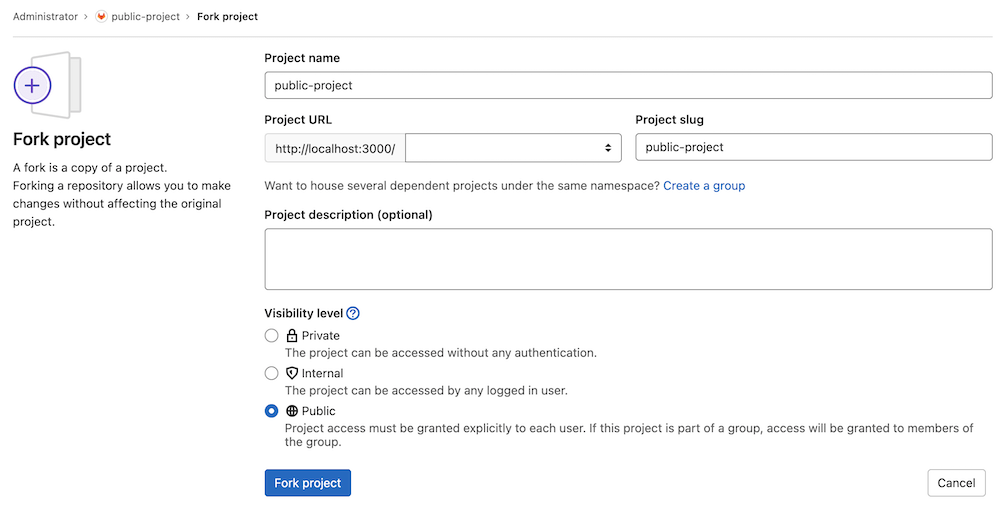
(Experimental method) If your GitLab administrator has enabled the experimental fork project form, read Create a fork with the fork project form. Only namespaces you have Developer and higher permissions for are shown.
The project path must be unique in the namespace. -
GitLab creates your fork, and redirects you to the project page for your new fork. The permissions you have in the namespace are your permissions in the fork.
Repository mirroring
You can use repository mirroring to keep your fork synced with the original repository. You can also use git remote add upstream to achieve the same result.
The main difference is that with repository mirroring, your remote fork is automatically kept up-to-date.
Without mirroring, to work locally you must use git pull to update your local repository
with the upstream project, then push the changes back to your fork to update it.
Read more about How to keep your fork up to date with its origin.
Merging upstream
When you are ready to send your code back to the upstream project, create a merge request. For Source branch, choose your forked project’s branch. For Target branch, choose the original project’s branch.
Then you can add labels, a milestone, and assign the merge request to someone who can review your changes. Then click Submit merge request to conclude the process. When successfully merged, your changes are added to the repository and branch you’re merging into.
Removing a fork relationship
You can unlink your fork from its upstream project in the advanced settings.
Create a fork with the fork project form
- Introduced in GitLab 13.11.
- It’s deployed behind a feature flag, disabled by default.
- It’s disabled on GitLab.com.
- It’s not recommended for production use.
- To use it in GitLab self-managed instances, ask a GitLab administrator to enable it.
This experimental version of the fork project form is available only if your GitLab administrator has enabled it:
To use it, follow the instructions at Creating a fork and provide:
- The project name.
- The project URL.
- The project slug.
- (Optional) The project description.
- The visibility level for your fork.
Enable or disable the fork project form
The new fork project form is under development and not ready for production use. It is deployed behind a feature flag that is disabled by default. GitLab administrators with access to the GitLab Rails console can enable it.
To enable it:
Feature.enable(:fork_project_form)
To disable it:
Feature.disable(:fork_project_form)


