极狐GitLab DevSecOps 七剑下天山之敏感信息检测
在应用程序开发过程中,一个很常见的问题就是:开发人员为了本地 debug 方便,会 hardcode 一些信息,比如连接数据库的用户名、密码、连接第三方 app 的 token、certificate 等,如果在提交代码的时候没有及时删除 hardcode 的信息,则非常容易造成敏感信息泄漏,带来被拖库、撞库等风险。因此,敏感信息管理是 DevSecOps 中一个非常重要的话题。
诚然,敏感信息的管理需要软件开发中的每一个人来负责,有安全意识,但是是人就总有疏忽犯错的时候,所以最好的方式之一就是将敏感信息的检测集成到 CI/CD 中,做到持续监测,而且能在开发人员提交代码的时候就进行,真正做到安全左移。
极狐GitLab 提供开箱即用的 DevSecOps 功能,包括七大功能:容器镜像扫描、静态应用安全测试 (SAST)、动态应用安全扫描(DAST)、密钥检测、License合规、依赖项扫描以及模糊测试。关于镜像安全扫描,可以查看文章极狐GitLab DevSecOps 七剑下天山之容器镜像安全扫描。这篇文章将介绍极狐GitLab DevSecOps 中关于敏感信息检测的功能。
极狐GitLab 敏感信息检测原理
极狐GitLab 敏感信息检测(Secret Detection)功能是开箱即用的,在 11.9 版本中引入。既可以对提交代码中的敏感信息进行检测,也可以对远程仓库进行重复性的扫描来进行敏感信息检测;既可以使用默认的规则进行敏感信息检测,也可以通过自定义规则来完成敏感信息检测。极狐GitLab 敏感信息检测是与语言无关的,也就以为是“全谱”可用的。
检测原理
敏感信息检测的思路一般是:读取文件内容 –> 根据定义规则进行内容匹配 -> 出具检测报告。极狐GitLab 敏感信息检测依旧是通过特定的分析器(analyzer)来完成的,
关于 Gitleaks
Gitleaks 是一款开源的 SAST 工具,可以用来对 hadrcode 的密码、API key、token 等敏感信息做检测。Gitleaks 具有安装容易,使用方便的特点,更多详细的内容可以查看 Gitleaks 的 GitHub。
Gitleaks 的安装
Gitleaks 的安装有多种方式,本文以 macOS 为例来演示,使用下面的命令即可在 macOS 上安装 Gitleaks
$ brew install gitleaks
可以使用 gitleaks -h 或者 gitleaks --version 来检查是否安装成功:
$ gitleaks --version
7.6.1
Gitleaks 的使用
Gitleaks 可以直接扫描本地文件,也可以直接扫描远端仓库。
- 使用 Gitleaks 来扫描本地文件
先来看看对于本地文件的扫描。新建一个包含敏感信息的文件,诸如:
$ cat > secret.txt <<  EOF
password="12232"
token="ADB#@DC"
EOF
添加一个 gitleaks.toml 文件,写入匹配规则:
$ cat > config.toml << EOF
title = "gitleaks config"
[[rules]]
description = "Password Type"
regex = '''[0-9]'''
tags = ["gitlab", "security"]
EOF
gitleaks 的匹配规则是用 TOML 来定义的,详情可查看gitleaks rules summary。
利用上述匹配规则,能够对全部是数字的信息进行匹配,并且将其标记为敏感信息,可以用如下命令进行扫描检测:
$ gitleaks --config-path=config.toml --path=secret.txt --no-git -v --report=report.json
参数说明:
- –config-path:指定写入了匹配规则的配置文件,一般是 xx.toml
- –path:指定要扫描检测的文件或者目录
- –report:指定输出报告的路径
- –no-git:将扫描目录视为普通目录去扫描检测,否则会去查找
.git目录,找不到就提示失败
可以看到如下的扫描结果
{
	"line": "password=\"12232\"",
	"lineNumber": 1,
	"offender": "1",
	"offenderEntropy": -1,
	"commit": "",
	"repo": "",
	"repoURL": "",
	"leakURL": "",
	"rule": "Password Type",
	"commitMessage": "",
	"author": "",
	"email": "",
	"file": ".",
	"date": "0001-01-01T00:00:00Z",
	"tags": "gitlab, security"
}
INFO[0000] scan time: 224 microseconds
WARN[0000] leaks found: 1
结果显示,匹配到一处检测结果(leaks found: 1),扫描时长(scan time: 224 microseconds,可以看出非常快)。而这一处泄漏就是第一行 password="12232"。这和最开始设置匹配规则时候的设想是一样的。
同时会在当前目录下看到一个 report.json 的文件:
$ls -ltr report.json
-rw-r--r--  1 xiaomage  wheel  328 Oct 26 14:24 report.json
里面记录的内容和上述标准输出的内容是一致的。
需要注意的是,如果检测出敏感信息,则扫描命令的退出结果为非 0 值:
$ gitleaks --config-path=config.toml --path=secret.txt --no-git -v --report=report.json
$ echo $?
1
如果想要指定执行命令的退出结果,则可以使用参数 --leaks-exit-code=:
$ gitleaks --config-path=config.toml --path=secret.txt --no-git -v --report=report.json --leaks-exit-code=0
$ echo $?
0
- 使用 Gitleaks 扫描远端仓库
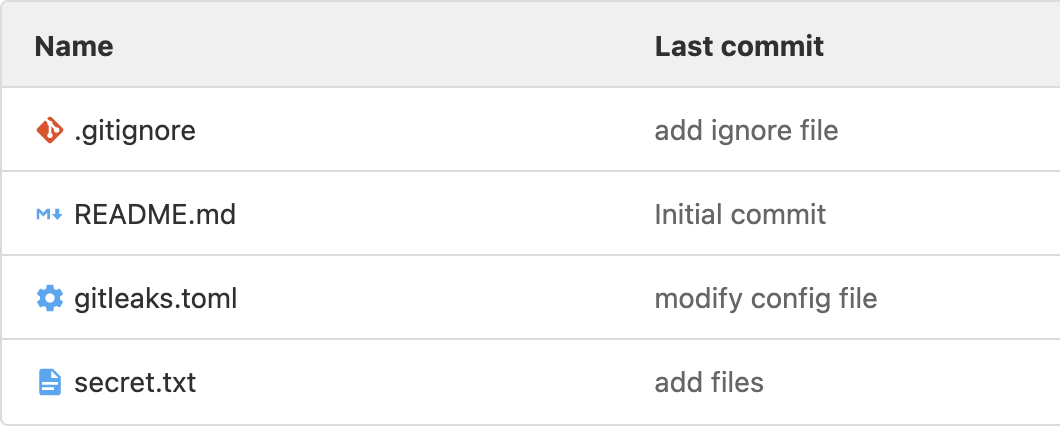
将上述的 secret.txt 文件和 gitleaks.toml 文件存放到极狐GitLab 的仓库中,如下:
执行如下命令进行远端仓库扫描:
gitleaks --repo-url=git@gitlab.cn:majinghe/secret-detection.git --username=jhma@gitla.cn --access-token=AdrW3vvLyWNyxnKUcwwv --ssh-key=path-to-ssh-key --repo-config-path=gitleaks.toml --report=report.json
参数说明:
- –repo-url:指定远端仓库的地址
- –username:扫描私有仓库时指定仓库的用户名
- –access-token:扫描私有仓库时指定的 personal access token,用来做权限验证;如果
--repo-url是用https的方式,则此参数可换成--password - –ssh-key:指定访问私有仓库所需的 ssh-key
- –repo-config-path:指定远端仓库中的规则匹配文件
- –report:指定扫描报告的名称
扫描结果如下:
INFO[0000] cloning... git@gitlab.cn:majinghe/secret-detection.git
INFO[0000] scan time: 999 microseconds
INFO[0000] commits scanned: 9
WARN[0000] leaks found: 9
很奇怪的是看到了9处检测点,但是文件里面只有一处啊,到底怎么回事呢?
对于 Gitleaks 来讲,如果不做额外的参数指定,则上述扫描命令会对远端仓库的所有 commit进行扫描,上述仓库有 9 个 commit,所以扫描了 9 次。可以通过参数来制定针对某一个 commit 或者某一个范围的 commit 信息进行扫描。若指定某个 commit 进行扫描,可看到:
$ gitleaks --repo-url=https://gitlab.cn/majinghe/secret-detection.git --username=极狐GitLab-username --password=极狐GitLab-password --repo-config-path=gitleaks.toml --report=report.json --commit=83c4c5e364bc249e410a5aa92716a35da8080111
INFO[0000] cloning... https://gitlab.cn/majinghe/secret-detection.git
INFO[0001] scan time: 204 microseconds
INFO[0001] commits scanned: 1
WARN[0001] leaks found: 2
出现了 2 处检测点,是因为将 gitleaks.toml 也进行了扫描:
 {
  "line": "regex = '''[0-9]'''",
  "lineNumber": 4,
  "offender": "0",
  "offenderEntropy": -1,
  "commit": "83c4c5e364bc249e410a5aa92716a35da8080111",
  "repo": "secret-detection.git",
  "repoURL": "https://gitlab.cn/majinghe/secret-detection.git",
  "leakURL": "https://gitlab.cn/majinghe/secret-detection.git/blob/83c4c5e364bc249e410a5aa92716a35da8080111/config.toml#L4",
  "rule": "Password Type",
  "commitMessage": "add files\n",
  "author": "xiaomage",
  "email": "jhma@gitlab.cn",
  "file": "config.toml",
  "date": "2021-10-26T14:38:20+08:00",
  "tags": "gitlab, security"
 }
可以通过在 gitleaks.toml 中定制化一下匹配规则来只扫描 secret.txt 文件:
title = "gitleaks config"
[[rules]]
description = "Password Type"
file = '''secret.txt'''
regex = '''[0-9]'''
tags = ["gitlab", "security"]
重新扫描检测
$ gitleaks --repo-url=https://gitlab.cn/majinghe/secret-detection.git --username=jhma@gitlab.cn --password=GitOpsIsMyMainJobIn2021 --repo-config-path=gitleaks.toml --report=report.json --commit=83c4c5e364bc249e410a5aa92716a35da8080111
INFO[0000] cloning... https://gitlab.cn/majinghe/secret-detection.git
INFO[0000] scan time: 130 microseconds
INFO[0000] commits scanned: 1
WARN[0000] leaks found: 1
此次扫面只有一处检测点,内容如下:
[
 {
  "line": "password=\"12232\"",
  "lineNumber": 1,
  "offender": "1",
  "offenderEntropy": -1,
  "commit": "83c4c5e364bc249e410a5aa92716a35da8080111",
  "repo": "secret-detection.git",
  "repoURL": "https://gitlab.cn/majinghe/secret-detection.git",
  "leakURL": "https://gitlab.cn/majinghe/secret-detection.git/blob/83c4c5e364bc249e410a5aa92716a35da8080111/secret.txt#L1",
  "rule": "Password Type",
  "commitMessage": "add files\n",
  "author": "xiaomage",
  "email": "jhma@gitlab.cn",
  "file": "secret.txt",
  "date": "2021-10-26T14:38:20+08:00",
  "tags": "gitlab, security"
 }
]
可以看到成功匹配到 secret.txt 里面的敏感信息。
当然,gitleaks 还有很多其他的参数来进行多种细粒度的扫描,可以查看gitleaks GitHub 官网。
极狐GitLab 敏感信息检测实践
单独使用镜像做扫描
极狐GitLab 敏感信息检测是通过分析器(analyzer)来实现的,而 analyzer 的核心就是 Gitleaks,详细内容可以查看敏感信息检测官方文档。analyzer 的镜像为:
registry.gitlab.com/security-products/secret-detection:3
可以直接使用此镜像来完成敏感信息扫描。将上面测试用的包含 secret.txt 和 gitleaks.toml 文件的仓库 clone 到本地,然后执行下面的命令启动一个容器:
$ docker run --rm -d -it -v $(pwd):/tmp/ registry.gitlab.com/security-products/secret-detection:3 sh
可以用 docker exec -it 进入容器,在里面可以看到容器里面已经安装了 Gitleaks 和 anaylyzer:
$ gitleaks --version
v7.5.0
$ ./analyzer --version
[INFO] [secrets] [2021-10-27T01:27:43Z] ▶ GitLab secrets analyzer v3.22.0
analyzer version 3.22.0
analyzer 就是极狐GitLab 执行敏感信息检测的法宝,其本身是对 gitleaks 做了封装,源码可以在这儿看到。大体思路就是读取 analyzer 命令后面的参数,然后拼装成 gitleaks 命令,然后执行。
将 /tmp/gitleaks.tmol 文件拷贝至根目录,执行如下命令即可完成敏感信息扫描
¥ ./analyzer run --target-dir /tmp/secret.txt
[INFO] [secrets] [2021-10-27T01:25:46Z] ▶ GitLab secrets analyzer v3.22.0
[INFO] [secrets] [2021-10-27T01:25:46Z] ▶ Detecting project
[INFO] [secrets] [2021-10-27T01:25:46Z] ▶ Found project in /tmp

[INFO] [secrets] [2021-10-27T01:25:46Z] ▶ Running analyzer
[INFO] [secrets] [2021-10-27T01:25:47Z] ▶ Creating report
拷贝的原因是
analyzer默认读取根目录下自带的gitleaks.toml文件。为了匹配到测试使用的敏感信息,对匹配规则做了一些定制化改动。
查看扫描报告:
$ cat tmp/gitleaks-100398148.json
[
 {
  "line": "password=\"12232\"",
  "lineNumber": 1,
  "offender": "1",
  "offenderEntropy": -1,
  "commit": "",
  "repo": "",
  "repoURL": "",
  "leakURL": "",
  "rule": "Password Type",
  "commitMessage": "",
  "author": "",
  "email": "",
  "file": ".",
  "date": "0001-01-01T00:00:00Z",
  "tags": "gitlab, security"
 }
]
可以看到结果和用 gitleaks 命令扫描是一样的。关于 analyzer 更多的用法可以使用 analyzer h 查看:
$ ./analyzer h
[INFO] [secrets] [2021-10-27T01:32:42Z] ▶ GitLab secrets analyzer v3.22.0
NAME:
   analyzer - GitLab secrets analyzer v3.22.0

USAGE:
   analyzer [global options] command [command options] [arguments...]

VERSION:
   3.22.0

AUTHOR:
   GitLab

COMMANDS:
   run, r      Run the analyzer on detected project and generate a compatible artifact
   search, s   Search for compatible projects and return project directory
   analyze, a  Analyze detected project and generate report
   convert, c  Convert analyzer output to a compatible artifact
   help, h     Shows a list of commands or help for one command

GLOBAL OPTIONS:
   --help, -h     show help (default: false)
   --version, -v  print the version (default: false)
当然,analyzer 很灵活的一点就是可以自己来根据极狐GitLab 提供的 Dockerfile 来构建自己所需的景象,Dockerfile 在这个仓库,内容如下:
FROM golang:1.15-alpine AS build

ENV CGO_ENABLED=0 GOOS=linux
WORKDIR /go/src/app
COPY . .
# build the analyzer binary and automatically set the AnalyzerVersion
# variable to the most recent version from the CHANGELOG.md file
RUN CHANGELOG_VERSION=$(grep -m 1 '^## v.*$' "CHANGELOG.md" | sed 's/## v//') && \
        PATH_TO_MODULE=`go list -m` && \
        go build -ldflags="-X '$PATH_TO_MODULE/metadata.AnalyzerVersion=$CHANGELOG_VERSION'" -o analyzer

FROM alpine:latest

ARG SCANNER_VERSION
ENV SCANNER_VERSION ${SCANNER_VERSION:-v7.5.0}

RUN wget -O /usr/local/bin/gitleaks https://github.com/zricethezav/gitleaks/releases/download/${SCANNER_VERSION}/gitleaks-linux-amd64 && \
    chmod a+x /usr/local/bin/gitleaks && \
    apk add --no-cache git

COPY --from=build --chown=root:root /go/src/app/analyzer /
COPY /gitleaks.toml /gitleaks.toml

ENTRYPOINT []
CMD ["/analyzer", "run"]
和极狐GitLab CI 集成使用
只需要简单配置极狐GitLab CI,即可将敏感信息检测集成到极狐GitLab CI/CD 中:
variables:
  SECURE_ANALYZERS_PREFIX: "registry.gitlab.com/security-products"
  SECRETS_ANALYZER_VERSION: "3"

services:
  - docker:20.10.7-dind

stages:
  - test

secret_detection:
  stage: test
  image: "$SECURE_ANALYZERS_PREFIX/secret-detection:$SECRETS_ANALYZER_VERSION"
  services: []
  allow_failure: true
  artifacts:
    reports:
      secret_detection: gl-secret-detection-report.json
    paths: [gl-secret-detection-report.json]
  script:
    - cp config/gitleaks.toml /
    - ../../../analyzer run --target-dir .
    - cat gl-secret-detection-report.json
可以查看构建日志:
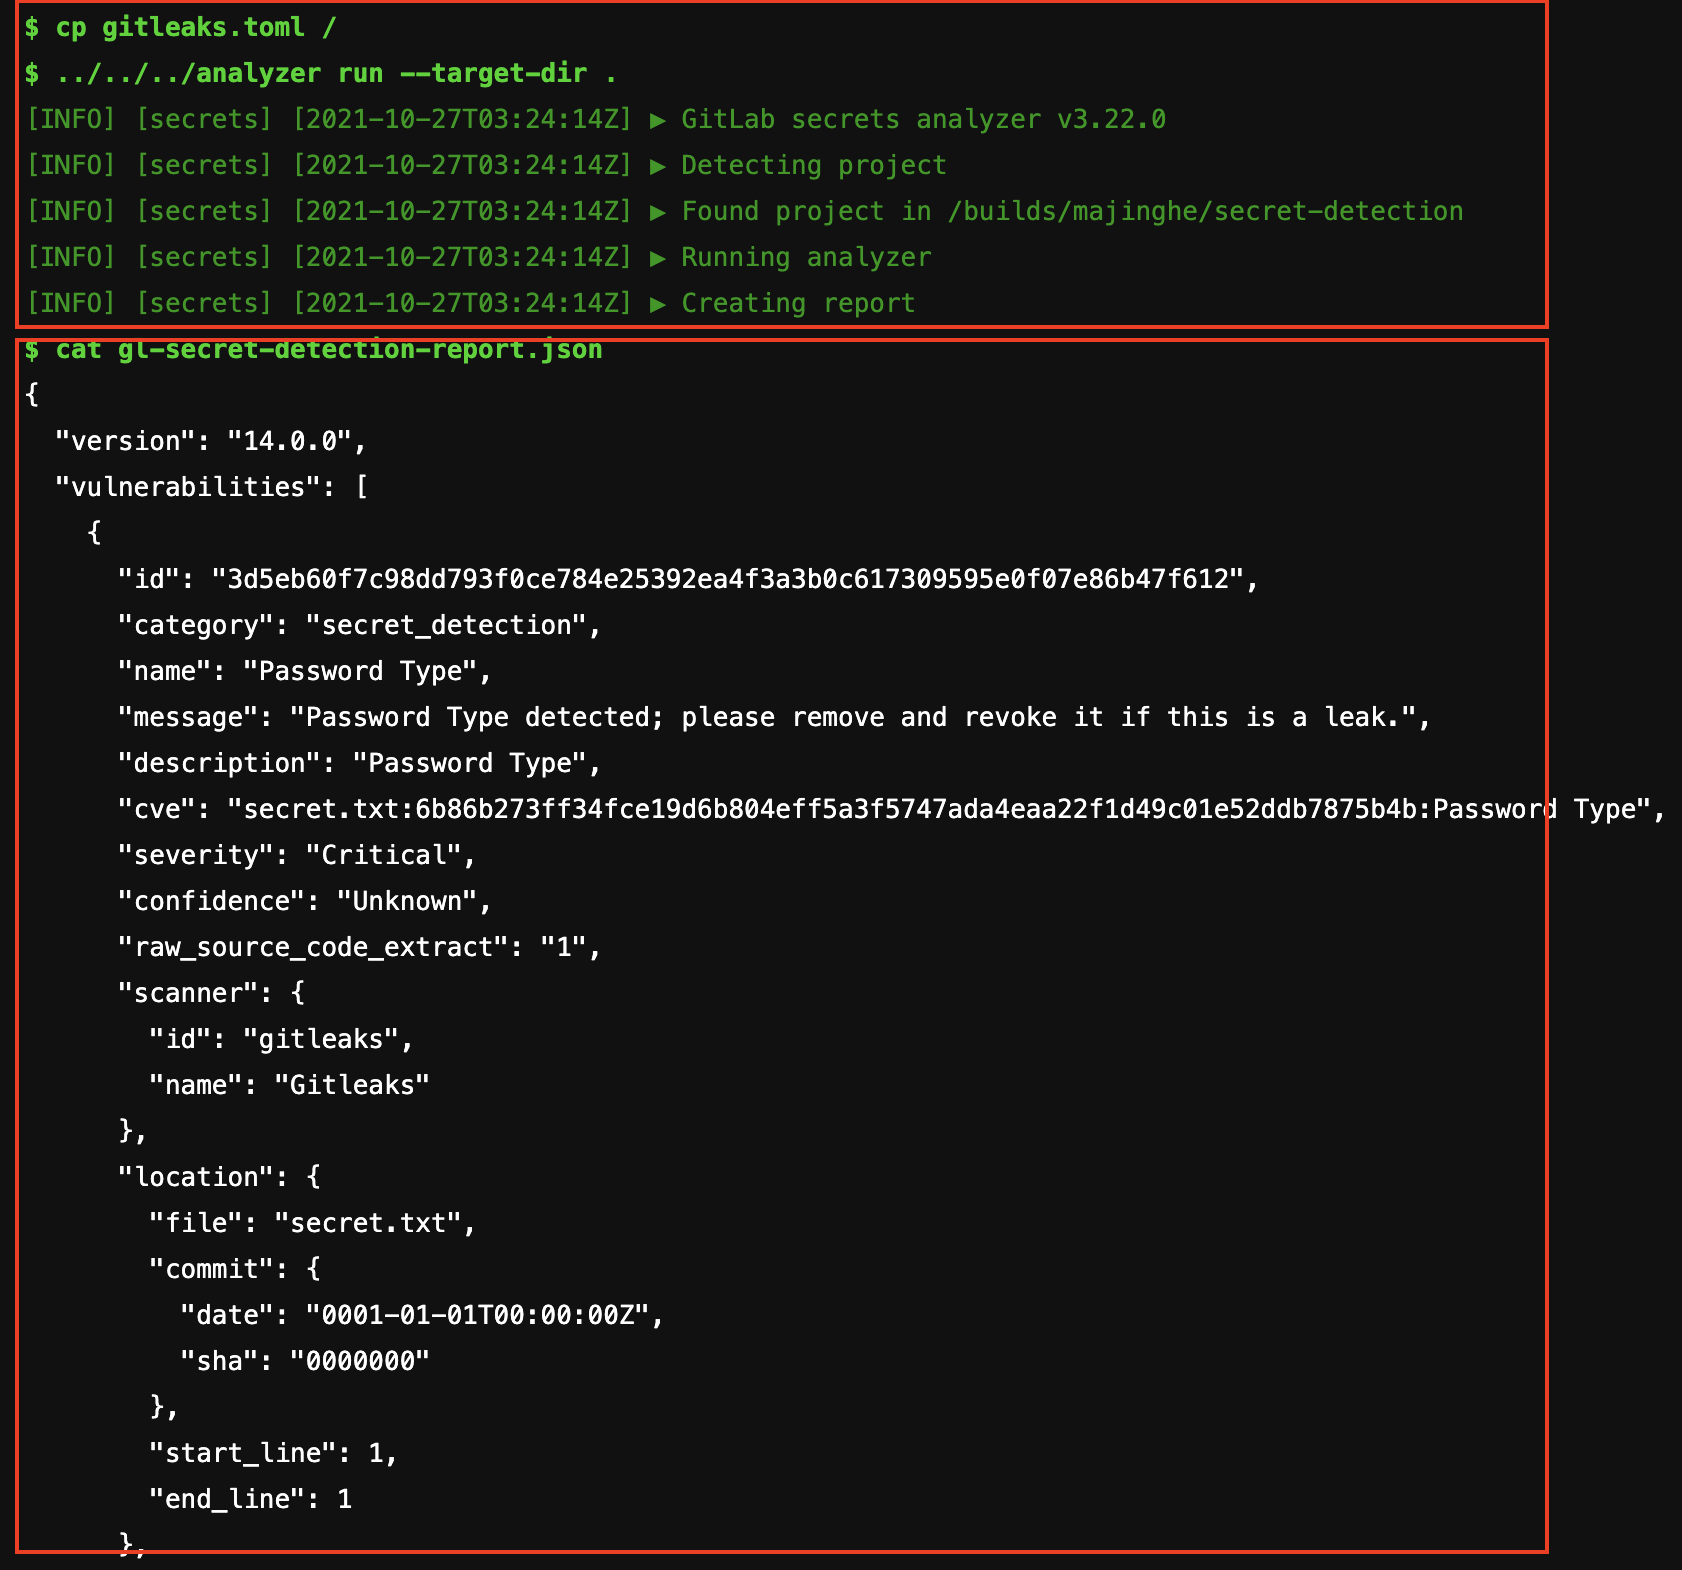
内容过长,只截取了部分,可以从红色方框看到扫描的过程以及扫描报告。因为在极狐GitLab CI 中加了 artifacts 关键字,所以也可以直接下载报告到本地进行查阅,下载方式可以参考公众号文章极狐GitLab DevSecOps 七剑下天山之容器镜像安全扫描。
极狐GitLab DevSecOps CI/CD
可以将容器镜像扫描、敏感信息检测加入极狐GitLab CI 中,打造 DevSecOps CI/CD:
variables:
  CS_ANALYZER_IMAGE: registry.gitlab.com/security-products/container-scanning/trivy:4
  KUBECONFIG: /tmp/.kube/config
  SECURE_ANALYZERS_PREFIX: "registry.gitlab.com/security-products"
  SECRETS_ANALYZER_VERSION: "3"

services:
  - docker:20.10.7-dind

stages:
  - build
  - test
  - deploy

build:
  image: docker:latest
  stage: build
  services:
    - docker:20.10.7-dind
  script:
    - docker login -u "$CI_REGISTRY_USER" -p "$CI_REGISTRY_PASSWORD" $CI_REGISTRY
    - docker build -t $CI_REGISTRY_IMAGE:3.0.0 .
    - docker push $CI_REGISTRY_IMAGE:3.0.0

container_scanning:
  image: "$CS_ANALYZER_IMAGE"
  stage: test
  variables:
    GIT_STRATEGY: fetch
    DOCKER_USER: "$CI_REGISTRY_USER"
    DOCKER_PASSWORD: "$CI_REGISTRY_PASSWORD"
    DOCKER_IMAGE: $CI_REGISTRY_IMAGE:3.0.0
  allow_failure: false
  artifacts:
    reports:
      container_scanning: gl-container-scanning-report.json
    paths: [gl-container-scanning-report.json]
  dependencies: []
  script:
    - gtcs scan

secret_detection:
  stage: test
  image: "$SECURE_ANALYZERS_PREFIX/secret-detection:$SECRETS_ANALYZER_VERSION"
  services: []
  allow_failure: true
  artifacts:
    reports:
      secret_detection: gl-secret-detection-report.json
    paths: [gl-secret-detection-report.json]
  script:
    - cp gitleaks.toml /
    - ../../../analyzer run --target-dir .
    - cat gl-secret-detection-report.json

deploy:
  stage: deploy
  image:
    name: bitnami/kubectl:latest
    entrypoint: [""]
  script:
     - mkdir -p /tmp/.kube
     - echo $kube_config | base64 -d > $KUBECONFIG
     - kubectl -n gitlab-k8s-demo apply -f deployment.yaml
可以查看 Pipeline 的构建流程:

上述流程是极狐GitLab DevSecOps 中关于敏感信息检测的原理及演示,但是实际使用中,需要用户根据自身的需求,完成更复杂的配置、集成,而对于这些极狐GitLab 都有很好的支持,更多详细内容可以查看官方文档。
写在最后
敏感信息检测其实是一个相对而言比较繁琐的安全工作,需要根据特定的敏感信息(不同厂商、不同产品的 API token,keys 等都有所不同)编写特定的匹配工作。可以将敏感信息检测集成到极狐GitLab CI/CD 中,实现安全左移、安全持续自动化,利用极狐GitLab 构建真正的 DevSecOps 体系。