在前面的文章中,演示了如何用安装包、docker、kubernetes 来安装运行极狐GitLab Runner。今天来演示如何用 k3s 来运行极狐GitLab Runner。
关于 K3s
K3s是 Rancher 发布的一款 Kubernetes 发行版,非常轻量,安装和使用也非常方便。
K3s 的安装
K3s 的安装有多种方式,详细内容可以查看K3s 官网。本文用如下命令来完成 K3s 的安装:
$ curl -sfL https://get.k3s.io | sh -
[INFO]  Finding release for channel stable
[INFO]  Using v1.21.7+k3s1 as release
[INFO]  Downloading hash https://github.com/k3s-io/k3s/releases/download/v1.21.7+k3s1/sha256sum-amd64.txt
[INFO]  Downloading binary https://github.com/k3s-io/k3s/releases/download/v1.21.7+k3s1/k3s
[INFO]  Verifying binary download
[INFO]  Installing k3s to /usr/local/bin/k3s
[INFO]  Skipping installation of SELinux RPM
[INFO]  Creating /usr/local/bin/kubectl symlink to k3s
[INFO]  Creating /usr/local/bin/crictl symlink to k3s
[INFO]  Skipping /usr/local/bin/ctr symlink to k3s, command exists in PATH at /usr/bin/ctr
[INFO]  Creating killall script /usr/local/bin/k3s-killall.sh
[INFO]  Creating uninstall script /usr/local/bin/k3s-uninstall.sh
[INFO]  env: Creating environment file /etc/systemd/system/k3s.service.env
[INFO]  systemd: Creating service file /etc/systemd/system/k3s.service
[INFO]  systemd: Enabling k3s unit
Created symlink /etc/systemd/system/multi-user.target.wants/k3s.service → /etc/systemd/system/k3s.service.
[INFO]  systemd: Starting k3s
可以用 kubectl 来查看安装是否成功:
$ kubectl  get nodes
NAME             STATUS   ROLES                  AGE     VERSION
vm-0-12-ubuntu   Ready    control-plane,master   3h42m   v1.22.5+k3s1
可以看到有一个单节点的 K3s 集群正在运行了。接下来就用 K3s 来运行极狐GitLab Runner。
极狐GitLab Runner 的安装
前提条件
在 K3s 上安装极狐GitLab Runner 需要确保提前安装了 Helm,v2 或 v3 版本均可,但是建议用 v3,本文的 Helm 版本信息如下:
$ helm version
version.BuildInfo{Version:"v3.7.1", GitCommit:"1d11fcb5d3f3bf00dbe6fe31b8412839a96b3dc4", GitTreeState:"clean", GoVersion:"go1.16.9"}
添加极狐GitLab Helm Chart Repo:
$ helm repo add gitlab https://charts.gitlab.io
values.yaml 文件修改
在 K3s 上安装极狐GitLab Runner,是通过 Helm 实现的,先要对极狐GitLab Runner 的 Helm Chart values.yaml进行一些参数修改:
imagePullPolicy: IfNotPresent
gitlabUrl: "https://jh-xiaomage.gitlab.cn"
runnerRegistrationToken: "orGbMhpz-9fyo2G4C46m"
concurrent: 10
checkInterval: 30
logLevel: info

rbac:
  create: true

metrics:
  enabled: false

runners:
  config: |
    [[runners]]
      [runners.kubernetes]
        namespace = "{{.Release.Namespace}}"
        image = "ubuntu:20.04"
        [[runners.kubernetes.volumes.host_path]]
            name = "docker"
            mount_path = "/var/run/docker.sock"
            host_path = "/var/run/docker.sock"
  privileged: "true"
  name: k3s-runner
  tags: "jh,k3s,runner"

securityContext:
  runAsUser: 100
  fsGroup: 65533
重要参数说明:
-
gitlabUrl:极狐GitLab 实例的 URL(本例为 https://jh-xiaomage.gitlab.cn);
-
runnerRegistrationToken:注册 Runner 时所需要的 Token;
-
concurrent:并行运行 Job 的最大值;
-
checkInterval:极狐GitLab 实例检查新构建的时间间隔;
-
runner:runner 的配置内容,包括 name,tag 等等,这些内容最后会以 config.toml 文件的形式呈现;
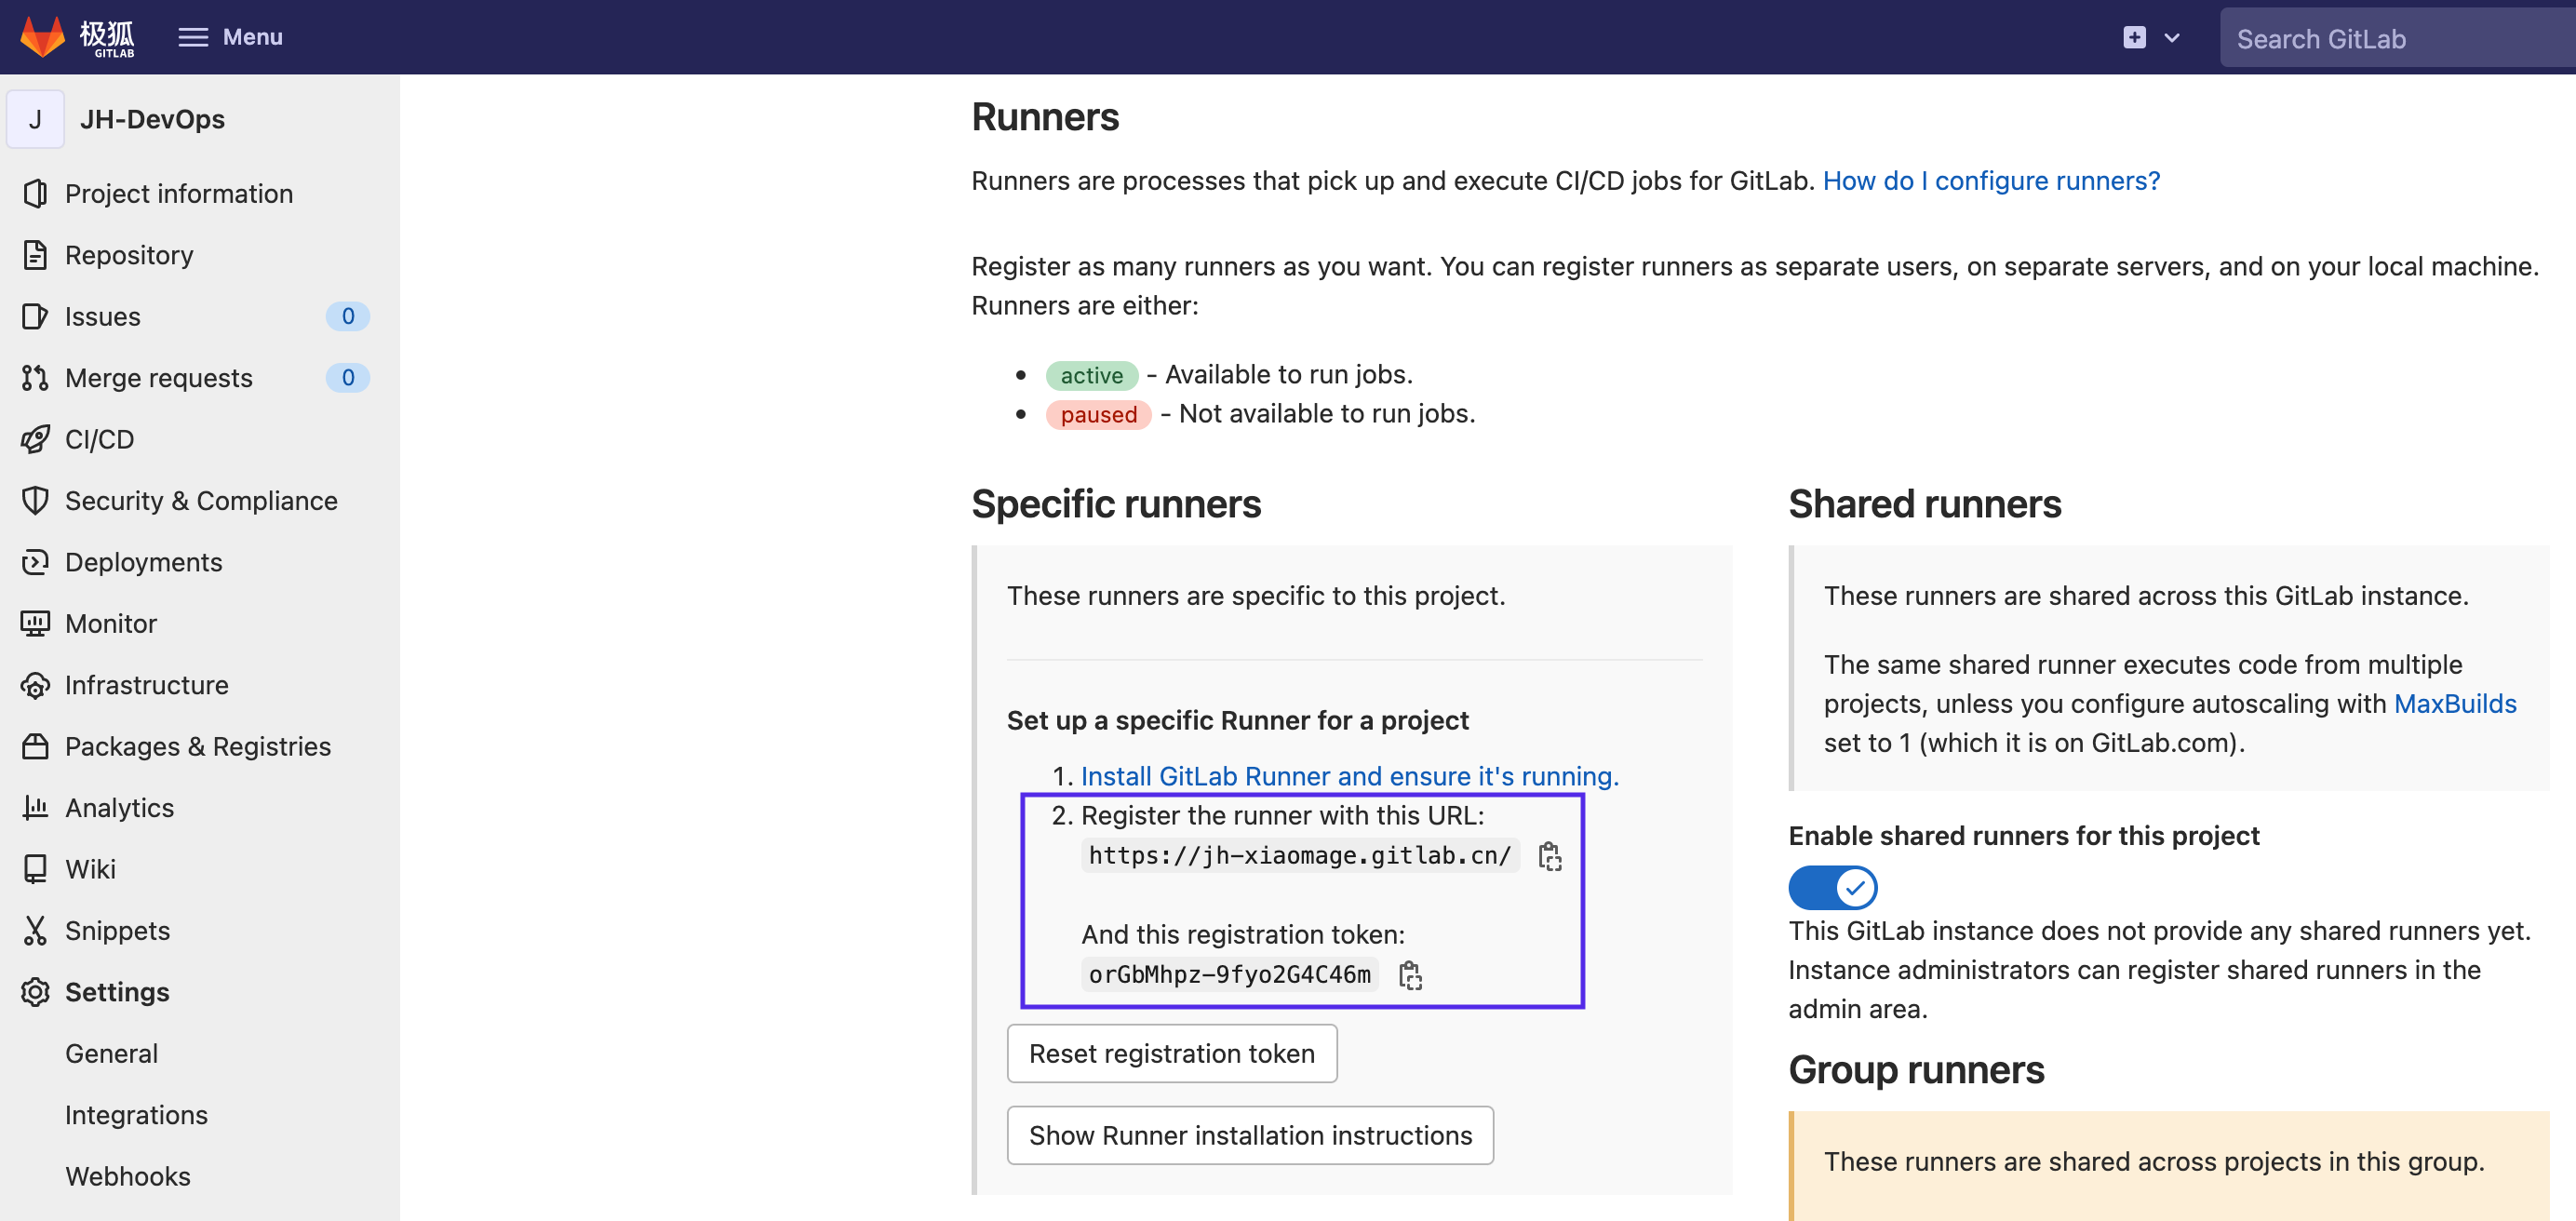
关于安装所需的 gitlabUrl、runnerRegistrationToken 可以在极狐GitLab 界面上看到(Settings –> CI/CD –> Runners)
用 Helm 安装极狐GitLab Runner
先创建一个 namespace:
$ kubectl create ns jh-k3s-runner
执行 helm install 命令,安装极狐GitLab Runner:
$ helm install --namespace jh-k3s-runner jh-k3s-runner -f values.yaml gitlab/gitlab-runner
NAME: jh-k3s-runner
LAST DEPLOYED: Mon Jan 10 14:32:48 2022
NAMESPACE: jh-k3s-runner
STATUS: deployed
REVISION: 1
TEST SUITE: None
NOTES:
Your GitLab Runner should now be registered against the GitLab instance reachable at: "https://jh-xiaomage.gitlab.cn"

Runner namespace "jh-k3s-runner" was found in runners.config template.
在 jh-k3s-runner namespace 下面会有一个 pod 生成:
$ kubectl  -n jh-k3s-runner get pods -w
NAME                                          READY   STATUS    RESTARTS   AGE
jh-k3s-runner-gitlab-runner-9744785c7-ftszl   0/1     Pending   0          0s
jh-k3s-runner-gitlab-runner-9744785c7-ftszl   0/1     Pending   0          0s
jh-k3s-runner-gitlab-runner-9744785c7-ftszl   0/1     Init:0/1   0          0s
jh-k3s-runner-gitlab-runner-9744785c7-ftszl   0/1     PodInitializing   0          2s
jh-k3s-runner-gitlab-runner-9744785c7-ftszl   0/1     Running           0          3s
jh-k3s-runner-gitlab-runner-9744785c7-ftszl   1/1     Running           0          20s
整个过程会完成极狐GitLab Runner 的注册,可以在 pod 的 log 中进行查看:
$ kubectl  -n jh-k3s-runner logs -f jh-k3s-runner-gitlab-runner-9744785c7-ftszl
Registration attempt 1 of 30
Runtime platform                                    arch=amd64 os=linux pid=14 revision=5316d4ac version=14.6.0
WARNING: Running in user-mode.
WARNING: The user-mode requires you to manually start builds processing:
WARNING: $ gitlab-runner run
WARNING: Use sudo for system-mode:
WARNING: $ sudo gitlab-runner...

Registering runner... succeeded                     runner=orGbMhpz
Merging configuration from template file "/configmaps/config.template.toml"
Runner registered successfully. Feel free to start it, but if it's running already the config should be automatically reloaded!
Runtime platform                                    arch=amd64 os=linux pid=7 revision=5316d4ac version=14.6.0
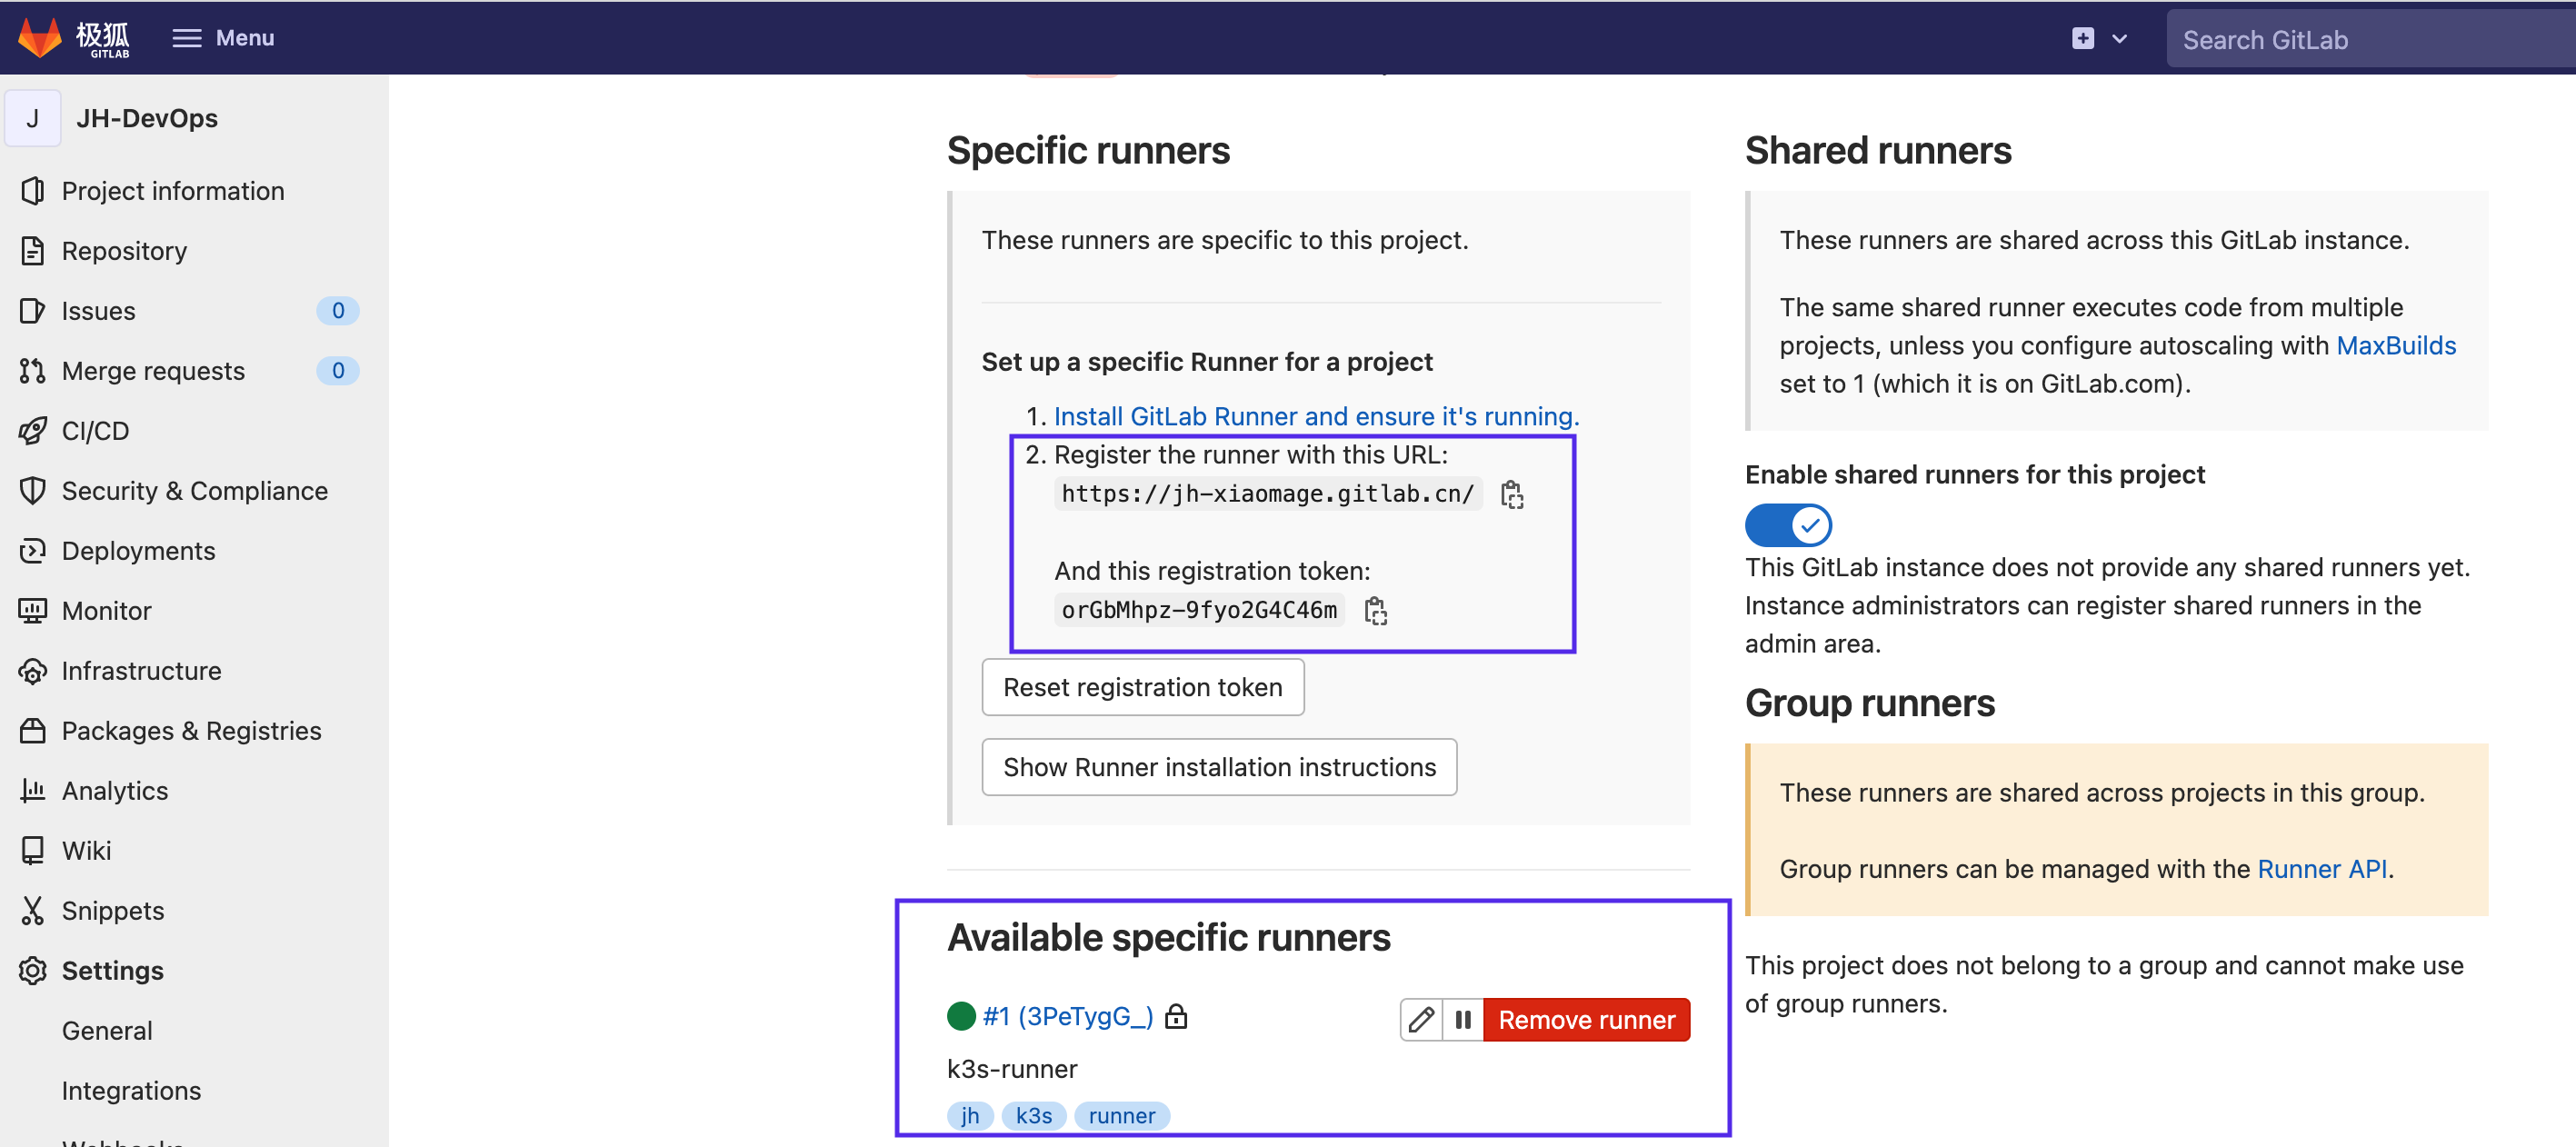
最终会在极狐GitLab Runner 界面看到已经有一个处于 active 的 Runner:
极狐GitLab Runner 使用
依旧用前面安装系列所用的 Demo 来演示在极狐 CI/CD 中使用此 Runner。.gitlab-ci.yml 的内容如下:
image: docker:20.10.7

services:
  - docker:20.10.7-dind

stages:
  - build

build:
  stage: build
  tags:
    - k3s
  script:
    - docker login -u "$CI_REGISTRY_USER" -p "$CI_REGISTRY_PASSWORD" $CI_REGISTRY
    - docker build -t $CI_REGISTRY_IMAGE:1.0.0 .
    - docker push $CI_REGISTRY_IMAGE:1.0.0
注意使用了 tags:k3s来让此 Runner 来执行被触发的 CI/CD Pipeline。可以查看一下 CI/CD Pipeline 的构建日志:
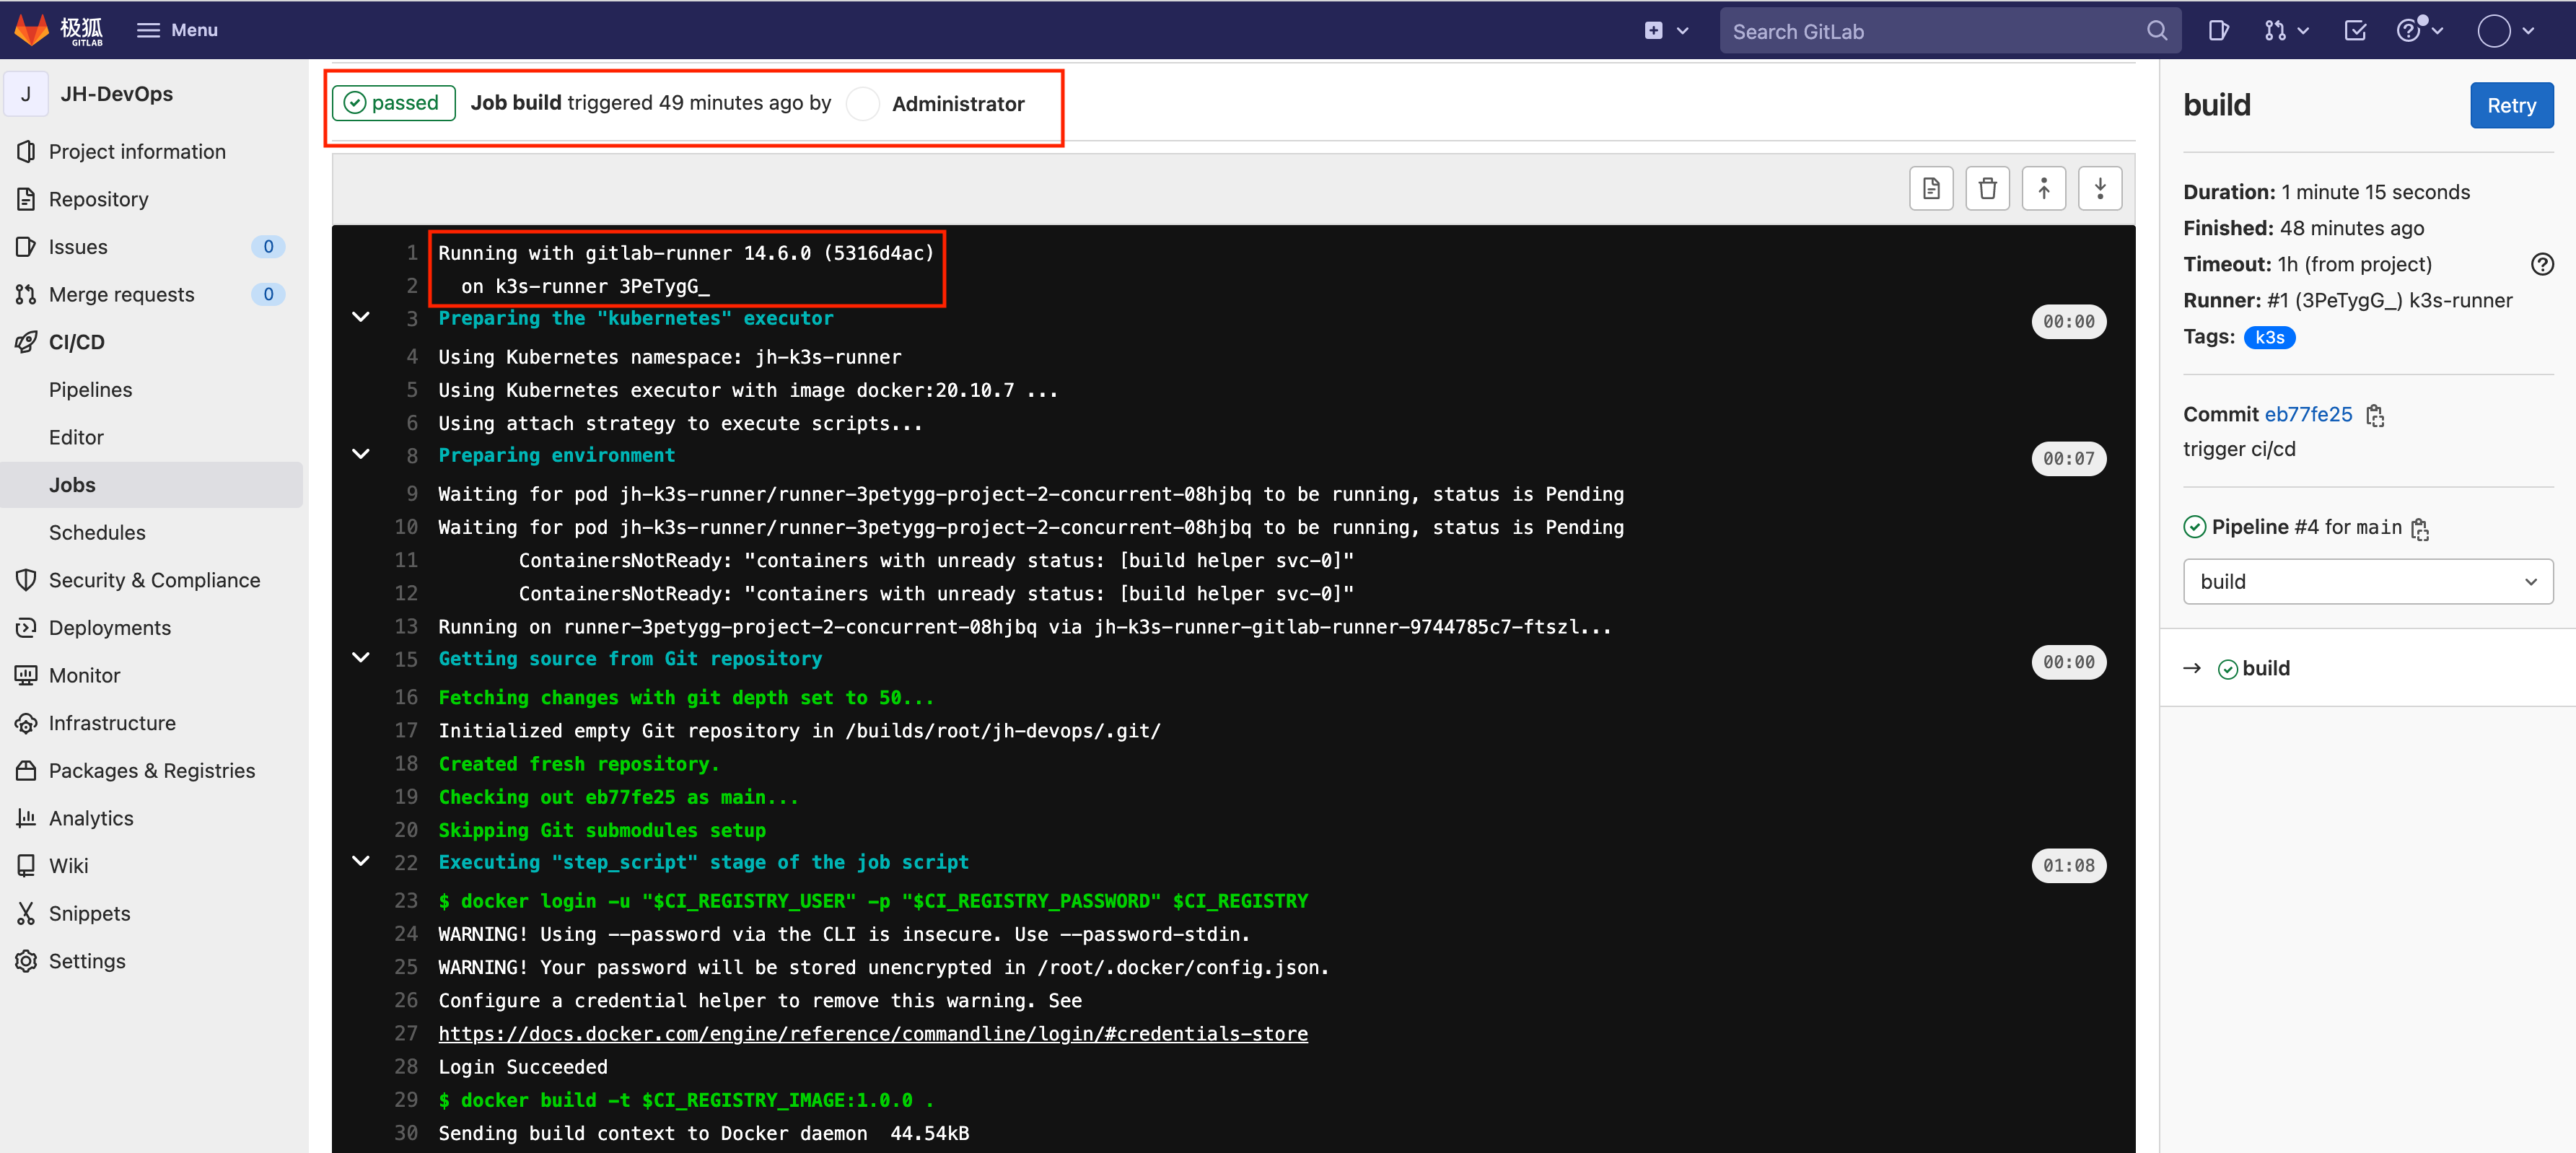
如图上红色方框所示,此次 CI/CD Pipeline 的执行是由在 k3s 上运行的 Runner 来完成的。
可以看到使用 k3s 来运行极狐GitLab Runner 也非常简单方便的。结合前面的用安装包、docker、kubernetes 来安装和运行极狐GitLab Runner 的演示就可以看出,极狐GitLab Runner 真的是安装方便,使用灵活,是极狐GitLab CI/CD 实现的强大助手。