
SVN(Subversion)和 Git 都是非常优秀版本控制工具,只不过近些年基于 Git 的 GitHub/GitLab/极狐GitLab 发展势头迅猛,让很多人忘记了 SVN。关于 SVN 和 Git 的对比,不是今天这篇文章的主题,本文将解析如何从 SVN 迁移到极狐GitLab。
前提条件
- 可用的 SVN 环境
- 极狐GitLab账号(自建或 SaaS 均可,SaaS 可登陆 https://gitlab.cn, 右上角登陆,申请注册)
- 服务器至少一台
SVN 的安装和配置使用
SVN 的安装
执行如下命令即可在 Ubuntu 20.04 上完成 SVN 的安装:
$ apt-get update
$ apt-get install libapache2-mod-svn subversion-tools libsvn-dev -y
$ apt install subversion -y
使用 svn --version 来检查安装是否成功:
$ svn --version
svn, version 1.13.0 (r1867053)
   compiled Mar 24 2020, 12:33:36 on x86_64-pc-linux-gnu
...... 太长,忽略其他信息 ......
SVN 配置使用
SVN 可以通过 svn/http/https 协议来使用。
SVN 协议配置使用
在 SVN 服务器上创建一个 svn 的目录:
$ mkdir /var/www/svn
使用 svnadmin 命令创建一个 svn 项目:
$ svnadmin create /var/www/svn/jh
接着就可以在 /var/www/svn/jh 目录下看到如下内容:
├── README.txt
├── conf
├── db
├── format
├── hooks
└── locks
所有的配置信息都在 conf 目录下面:
tree conf/
├── authz
├── hooks-env.tmpl
├── passwd
└── svnserve.conf
修改 passwd 文件来完成用户验证设置:
[users]
xiaomage = passw0rd
修改 authz 文件来完成对用户权限的设置:
[/]
xiaomage = rw
修改 svnserve.conf 文件完成对 svnserver 的设置:
anon-access = none
auth-access = write
password-db = passwd
authz-db = authz
接着执行如下命令,启动 svnserver:
$ svnserver -d -r /var/www/svn/jh
在另外一台服务器上,用 svn 客户端命令查看 svn 服务器配置过程是否正确:
$ svn checkout svn://your-svn-server-ip-or-domain/jh --username svn-username --password svn-password
Checked out revision 0.
上述完成了 svn 服务器的配置以及用 svn 协议来使用 svn。
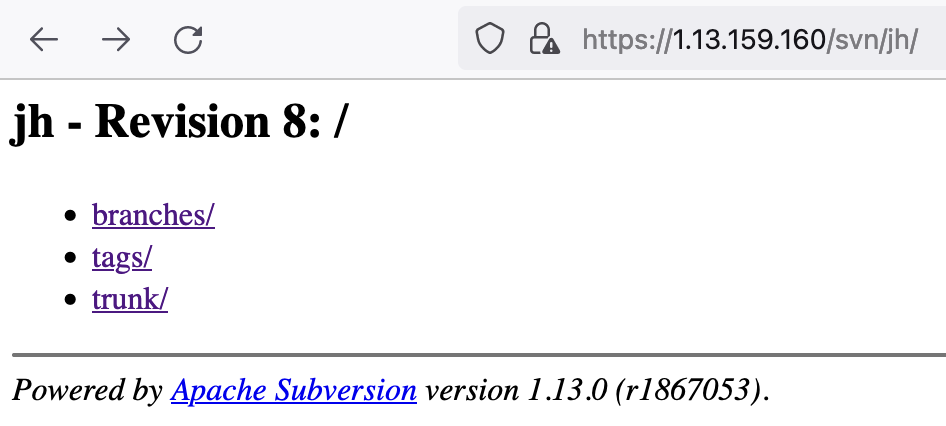
HTTP/HTTPS 协议配置使用
关于 SVN HTTP/HTTPS 的配置使用,可以参考SVN HTTP 配置以及SVN HTTPS 配置这两篇文章。下图展示了配置完 HTTPS 并用 HTTPS 来登录 SVN 的情况:
SVN 到极狐GitLab的迁移
从 SVN 到极狐GitLab的迁移有两种方式:svn2git 和 SubGit。
下面先介绍使用 svn2git 来完成从 SVN 到极狐GitLab的迁移。
使用 svn2git 来迁移
svn2git 的安装
svn2git是一个用来将项目从 SVN 迁移到 Git 的工具。其核心原理是使用git-svn 来克隆 svn 仓库,然后做一些清理工作,以便 branch 和 tags 能被正确导入。
svn2git 有多种安装方式,在安装了 Ruby 和 Git 的情况下,可以用如下命令安装:
$ gem install svn2git
基于 Debian 的 Linux 系统,可以用如下命令安装:
$ apt-get install git-core git-svn ruby
当然,极狐GitLab团队已经将编译好的二进制文件包托管到了极狐GitLab SaaS 上:https://jihulab.com/jihulab/customersuccess/common/svn2git/-/releases。下载解压即可使用。
可以用 svn2git --help 来查看
$ svn2git --help
Usage: svn2git SVN_URL [options]

Specific options:
        --rebase                     Instead of cloning a new project, rebase an existing one against SVN
        --username NAME              Username for transports that needs it (http(s), svn)
        --password PASSWORD          Password for transports that need it (http(s), svn)
        --trunk TRUNK_PATH           Subpath to trunk from repository URL (default: trunk)
        --branches BRANCHES_PATH     Subpath to branches from repository URL (default: branches); can be used multiple times
        --tags TAGS_PATH             Subpath to tags from repository URL (default: tags); can be used multiple times
        --rootistrunk                Use this if the root level of the repo is equivalent to the trunk and there are no tags or branches
        --notrunk                    Do not import anything from trunk
        --nobranches                 Do not try to import any branches
        --notags                     Do not try to import any tags
        --no-minimize-url            Accept URLs as-is without attempting to connect to a higher level directory
        --revision START_REV[:END_REV]
                                     Start importing from SVN revision START_REV; optionally end at END_REV
    -m, --metadata                   Include metadata in git logs (git-svn-id)
        --authors AUTHORS_FILE       Path to file containing svn-to-git authors mapping (default: ~/.svn2git/authors)
        --exclude REGEX              Specify a Perl regular expression to filter paths when fetching; can be used multiple times
    -v, --verbose                    Be verbose in logging -- useful for debugging issues
        --rebasebranch REBASEBRANCH  Rebase specified branch.

    -h, --help                       Show this message
使用 svn2git 进行迁移
文章最开始的 svn 仓库有一个 trunk 分支,三个 branch(01,02,03),三个 tags(v1.0.0,v2.0.0,v3.0.0):
$ tree -d -L 2
.
|-- branches
|   |-- 01
|   |-- 02
|   `-- 03
|-- tags
|   |-- v1.0.0
|   |-- v2.0.0
|   `-- v3.0.0
`-- trunk
    `-- gitlab
- 用户信息匹配(可选)
可以将 svn 的用户信息和极狐GitLab的用户信息做一个映射,以便代码提交信息可以和正确的极狐GitLab用户相互匹配。用下面的命令可以导出 svn 中用户的信息:
$ svn log --quiet | grep -E "r[0-9]+ \| .+ \|" | cut -d'|' -f2 | sed 's/ //g' | sort | uniq
用下面的信息格式,将上述内容写入一个 authors.txt 文件:
svn username = 极狐GitLab用户信息
比如:
xiaomage = xiaomage <xiaomage@gitlab.cn>
上述的 authors.txt 文件可以在后面用到。
- 使用
svn2git检出 svn 代码并转换为 Git 仓库
$ svn2git svn://1.13.159.160/jh --username xiaomage
......太长,只截取最后的 log ......
Successfully followed parent
r8 = 82d6e40f84159b2056087f017dff999664b7f9e2 (refs/remotes/svn/tags/v3.0.0)
Checked out HEAD:
  svn://1.13.159.160/jh/trunk r2
********************************************************************
svn2git warning: Tracking remote SVN branches is deprecated.
In a future release local branches will be created without tracking.
If you must resync your branches, run: svn2git --rebase
********************************************************************
如果需要做用户匹配,则需要在命令行后面加参数 –authors /path/to/authors.txt。同时,上述命令适用于具有标准目录结构(具有 trunk,branches,tags 等目录)的 svn 仓库。对于非标准的 svn 仓库,需要在迁移的时候通过 –branches,–tags 等参数来做 branch 和 tag 的映射,详细使用可以用 –help 来查看。
接着可以查看 branch 和 tag:
$ git branch --all
  01
  02
  03
* master
  remotes/svn/01
  remotes/svn/02
  remotes/svn/03
  remotes/svn/trunk

$ git tag
v1.0.0
v2.0.0
v3.0.0
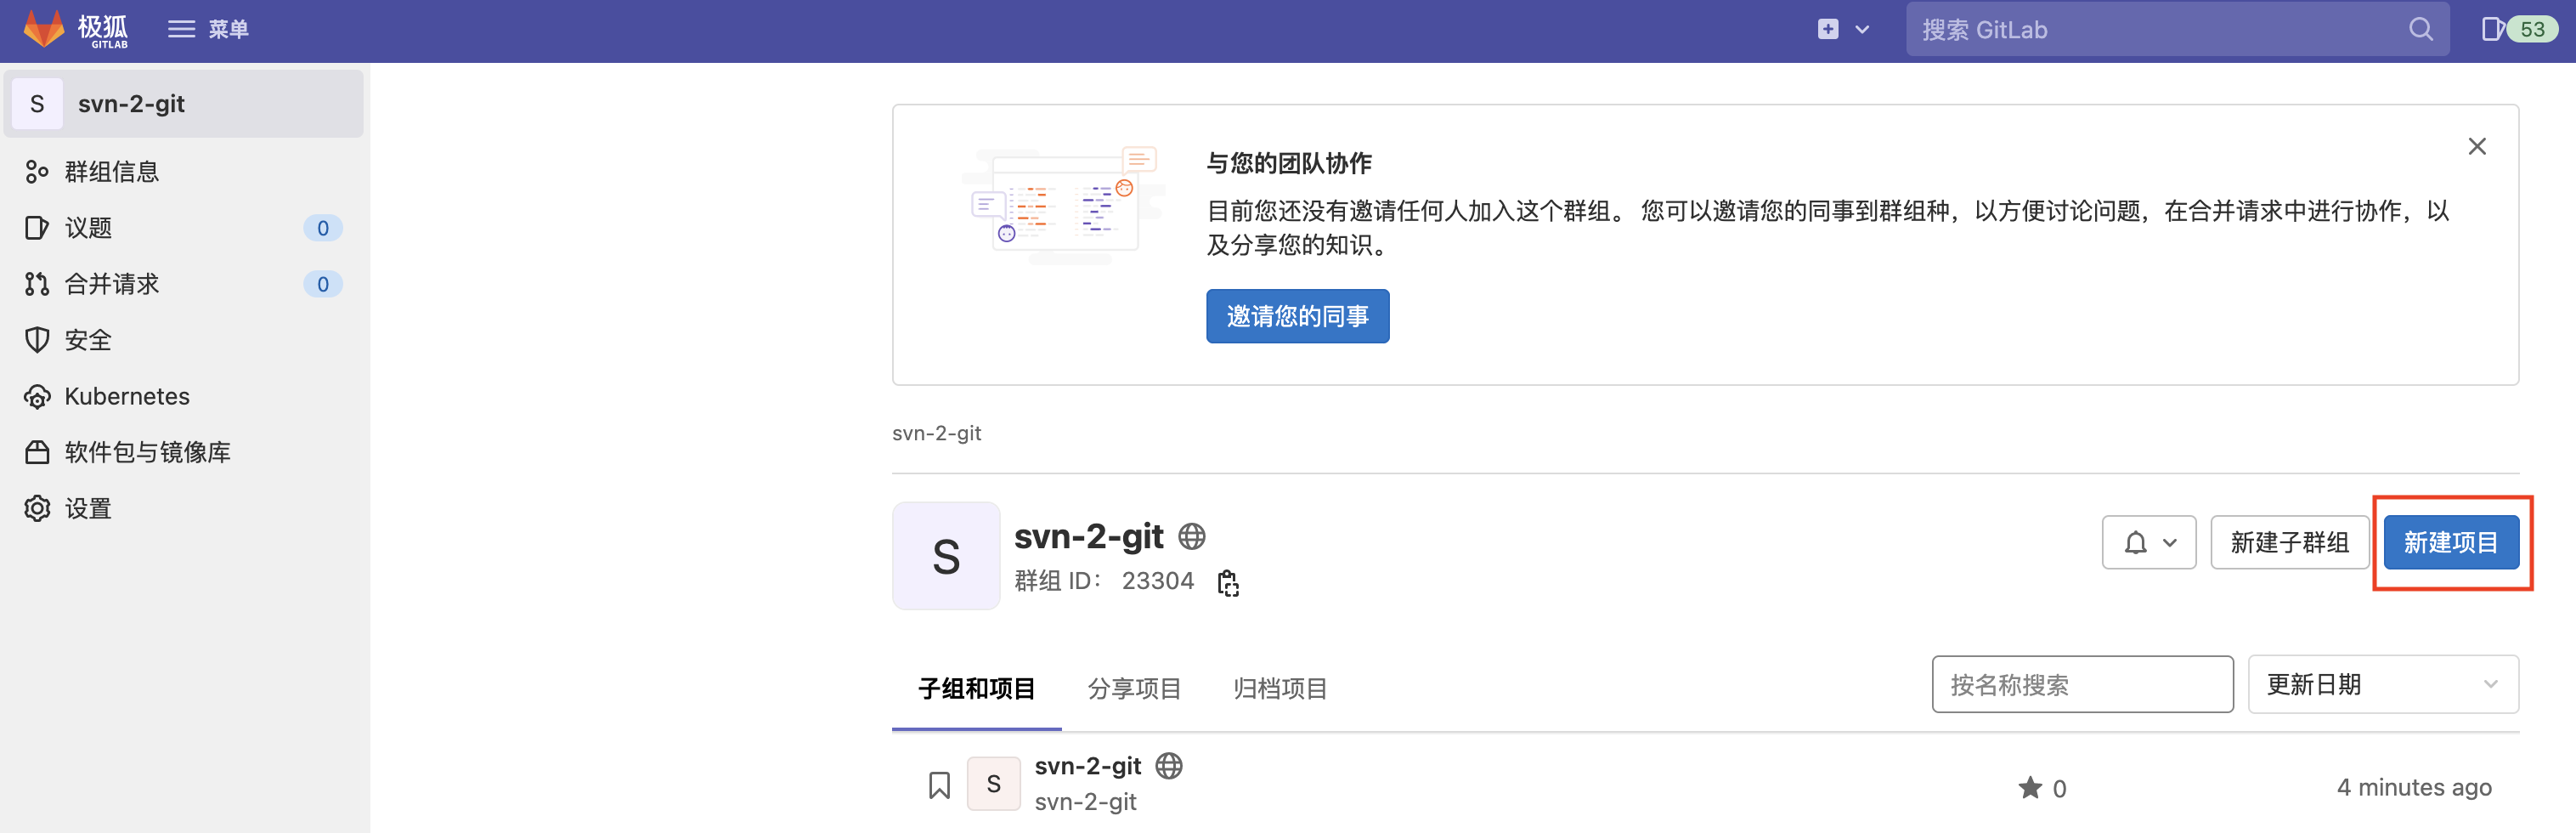
- 在极狐GitLab上创建一个空仓库
登陆 https://jihulab.com, 创建一个空仓库(如果还未进行注册,可以登陆 https://gitlab.cn,点击右上角进行注册)
- 添加远端仓库地址
$ git remote add origin git@jihulab.com:svn-2-git/svn-2-git.git
$ git remote -v
origin	git@jihulab.com:svn-2-git/svn-2-git.git (fetch)
origin	git@jihulab.com:svn-2-git/svn-2-git.git (push)
- 推送本地代码到远端仓库
$ git push --all origin
Counting objects: 616, done.
Delta compression using up to 2 threads.
Compressing objects: 100% (424/424), done.
Writing objects: 100% (616/616), 633.54 KiB | 0 bytes/s, done.
Total 616 (delta 179), reused 616 (delta 179)
remote: Resolving deltas: 100% (179/179), done.
remote:
remote: To create a merge request for 01, visit:
remote:   https://jihulab.com/svn-2-git/svt-2-git/-/merge_requests/new?merge_request%5Bsource_branch%5D=01
remote:
remote:
remote: To create a merge request for 02, visit:
remote:   https://jihulab.com/svn-2-git/svt-2-git/-/merge_requests/new?merge_request%5Bsource_branch%5D=02
remote:
remote:
remote: To create a merge request for 03, visit:
remote:   https://jihulab.com/svn-2-git/svt-2-git/-/merge_requests/new?merge_request%5Bsource_branch%5D=03
remote:
remote:
remote: To create a merge request for master, visit:
remote:   https://jihulab.com/svn-2-git/svt-2-git/-/merge_requests/new?merge_request%5Bsource_branch%5D=master
remote:

git push --tags origin
Counting objects: 6, done.
Delta compression using up to 2 threads.
Compressing objects: 100% (4/4), done.
Writing objects: 100% (6/6), 718 bytes | 0 bytes/s, done.
Total 6 (delta 2), reused 5 (delta 2)
To git@jihulab.com:svn-2-git/svt-2-git.git
 * [new tag]         v1.0.0 -> v1.0.0
 * [new tag]         v2.0.0 -> v2.0.0
 * [new tag]         v3.0.0 -> v3.0.0
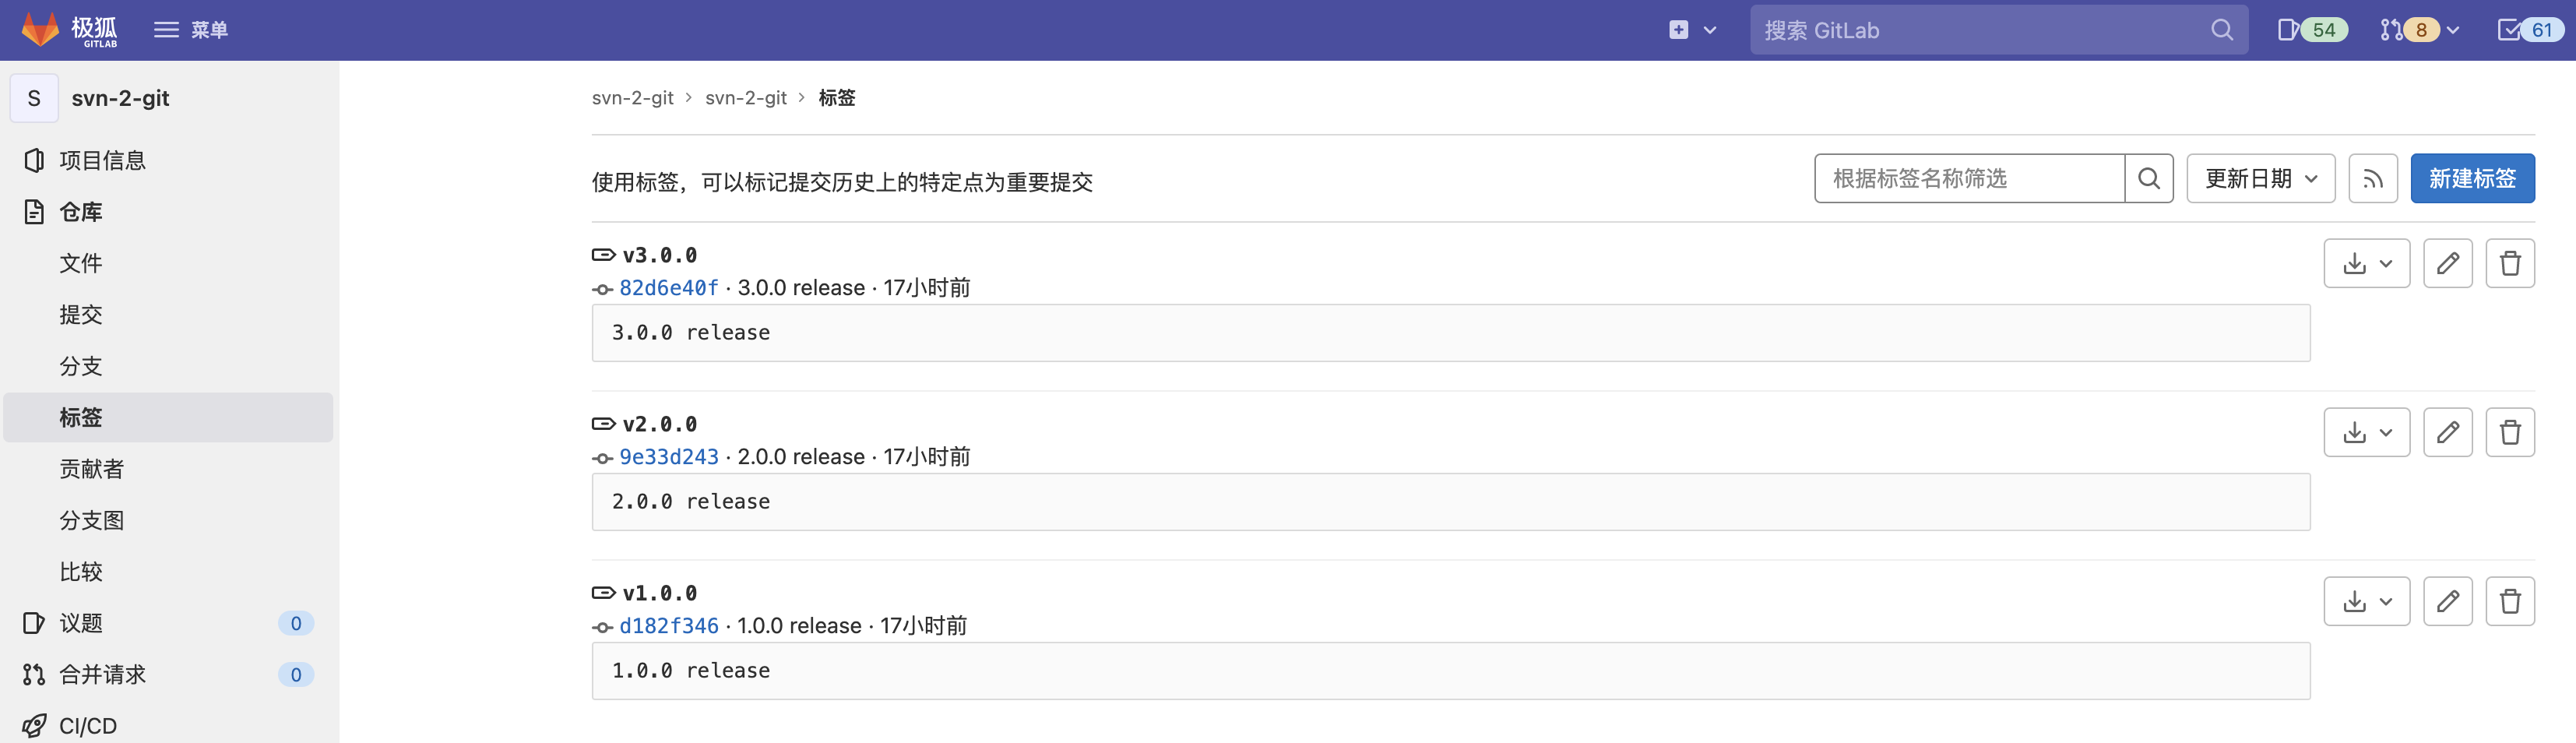
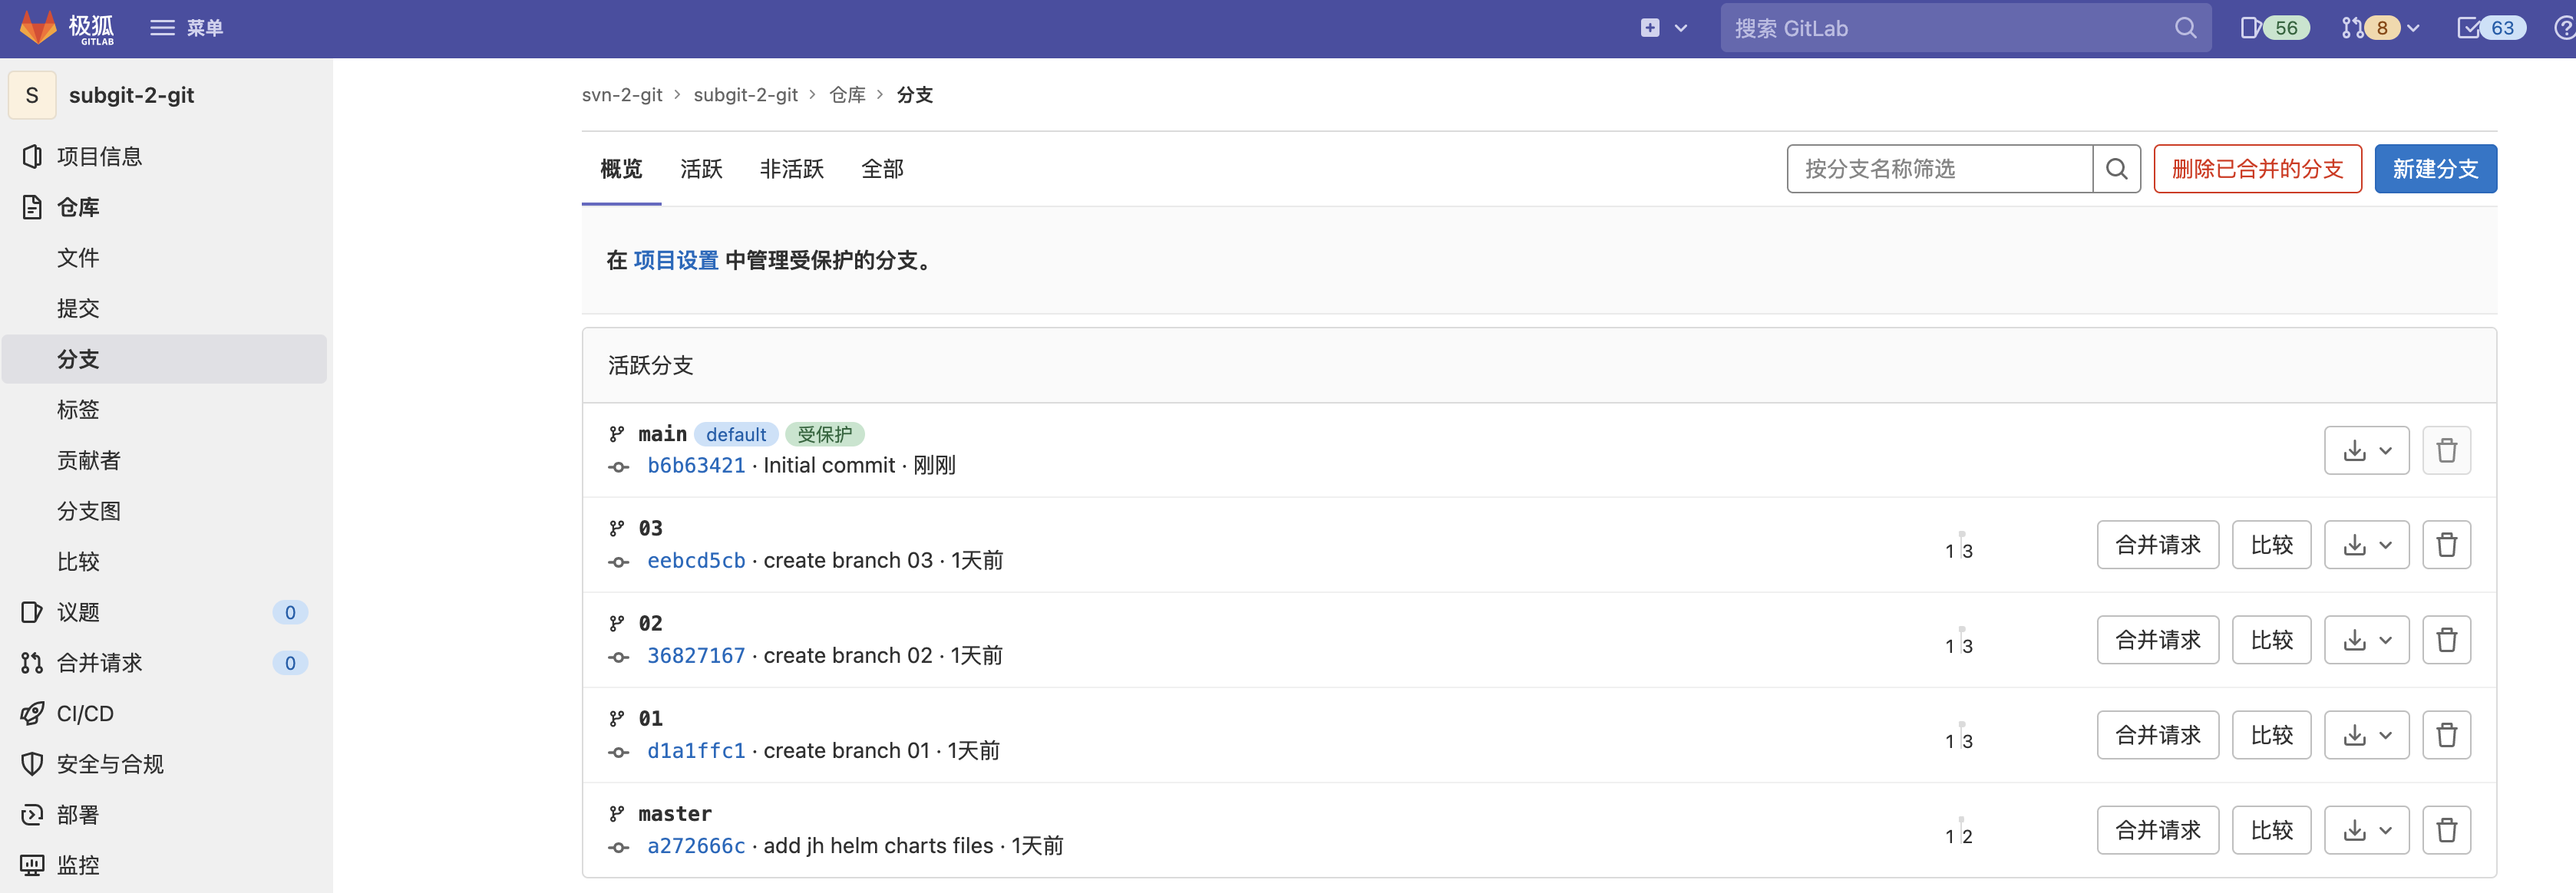
接着就可以在极狐GitLab界面上看到相应的 branch,tags 都推送成功了:
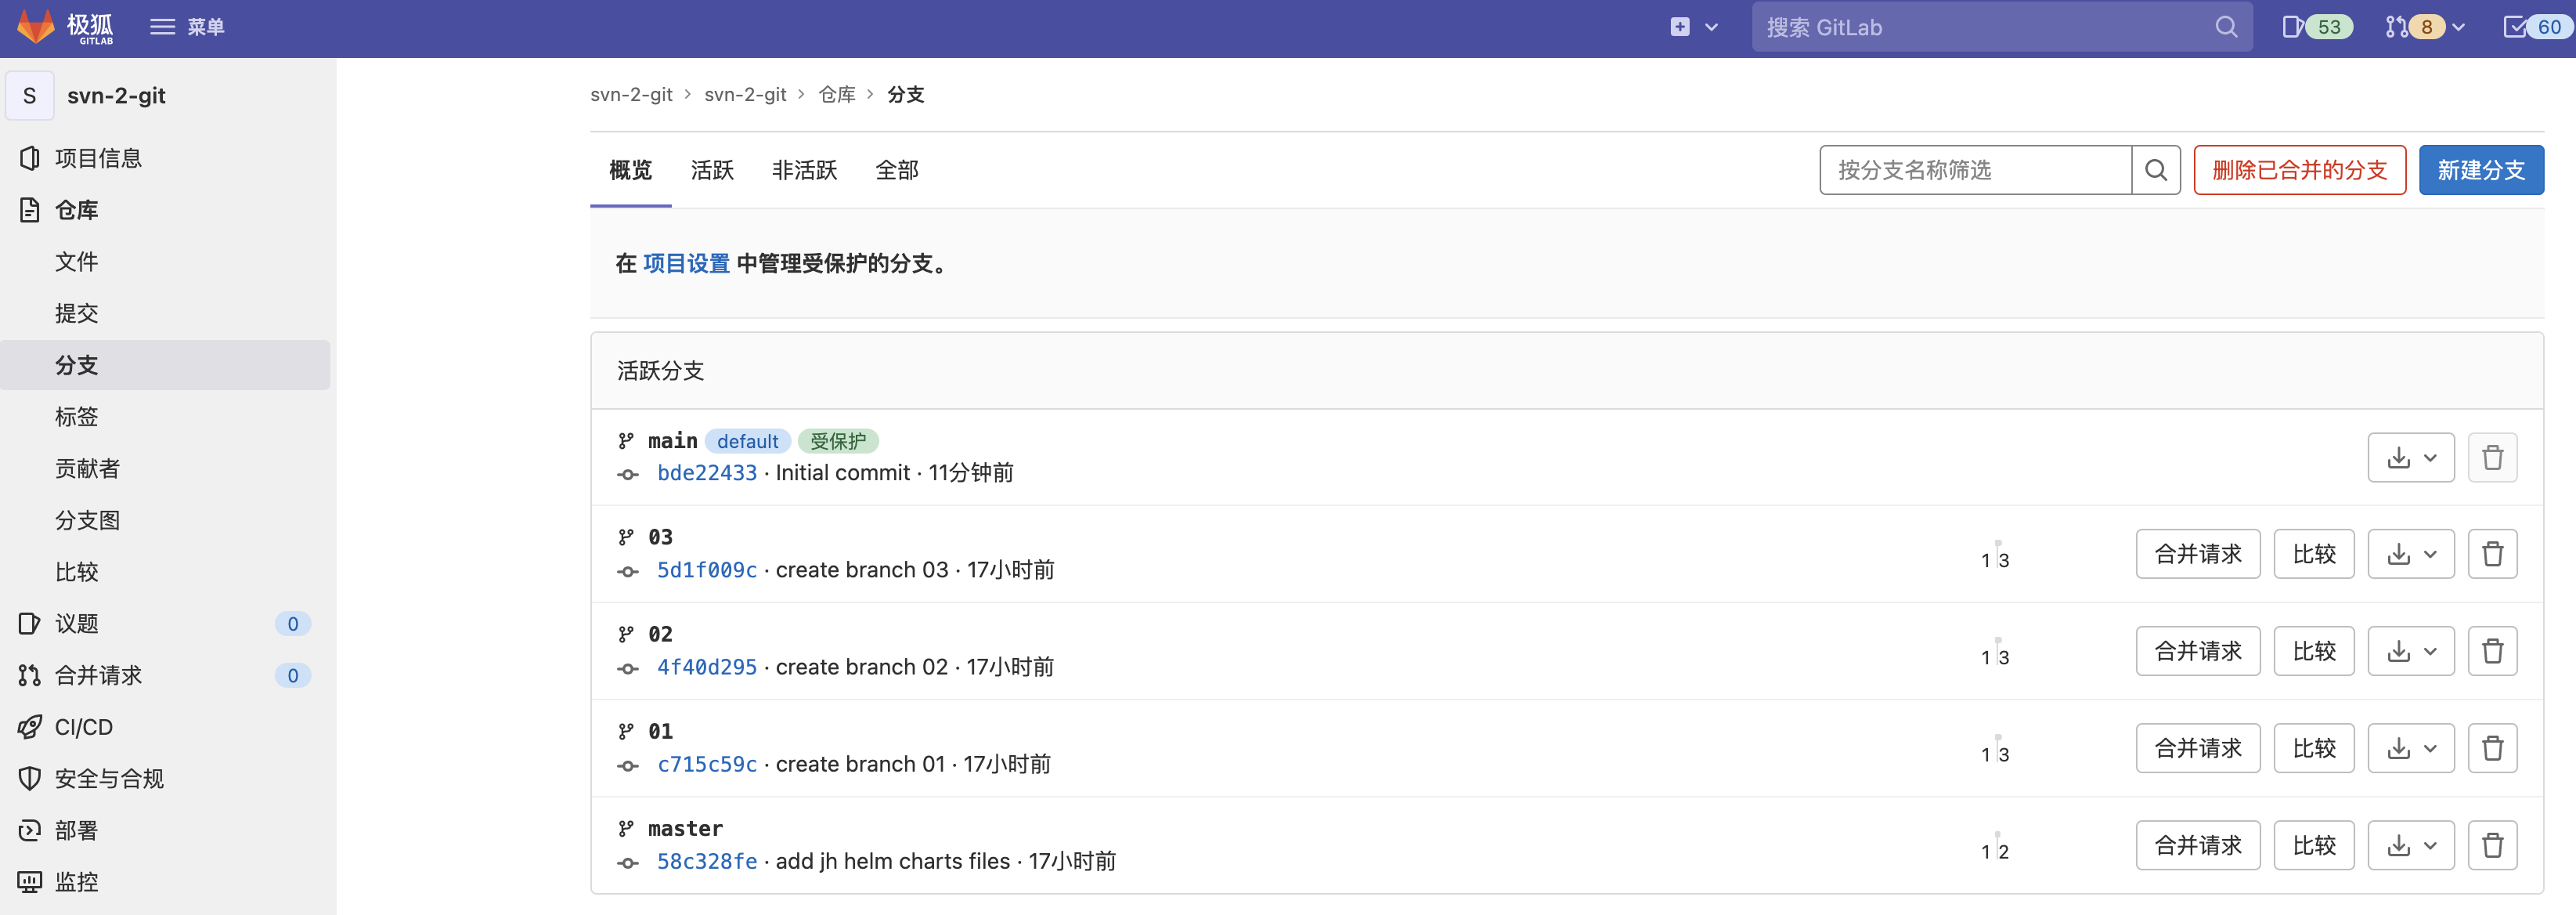
由于极狐GitLab的默认分支是
main,svn 转换过来的是master,可以将master分支 merge 到main分支,后续以main分支开展后续工作,以避免一些不便。
使用 SubGit 来迁移
SubGit 的安装
SubGit 安装的前提需要 JRE>1.8 的环境。然后直接在SubGit 官网上下载安装包,解压即可:
$ unzip subgit-3.3.13.zip
$ mv subgit-3.3.13 /opt
$  ln -s /opt/subgit-3.3.13/bin/subgit /usr/local/bin/
通过 subgit --version 命令来确认安装是否成功:
$ subgit --version
SubGit version 3.3.13 ('Bobique') build #4426
  (c) TMate Software 2012-2021 (http://subgit.com/)
SubGit 的配置
SubGit 是安装在极狐GitLab服务器上的,因为它需要和服务器上的 Repo 文件系统进行直接通信,所以下面的操作流程适合自管理(Self-managed)版本的极狐GitLab 实例,如果是 SaaS 服务,则和恰面的 svn2git 的方法类似。
首先需要设置一个空库用来做镜像,在极狐GitLab实例上面创建一个空仓库:
可以在极狐GitLab服务器的上找到这个仓库所对应的文件系统路径:
$ /var/opt/gitlab/git-data/repositories/@hashed/d4/73/d4735e3a265e16eee03f59718b9b5d03019c07d8b6c51f90da3a666eec13ab35.git
$ cat config
[core]
	repositoryformatversion = 0
	filemode = true
	bare = true
	logallrefupdates = true
	autocrlf = false
	eol = lf
	symlinks = true
[gitlab]
	fullpath = xiaomage/svn-2-git
将环境变量 GIT_REPO_PATH 的值设置为上述路径:
$ GIT_REPO_PATH=/var/opt/gitlab/git-data/repositories/@hashed/d4/73/d4735e3a265e16eee03f59718b9b5d03019c07d8b6c51f90da3a666eec13ab35.git
通过环境变量设置 svn 仓库的地址:
$ SVN_PROJECT_URL=svn://1.13.159.160/jh
通过 SubGit 来设置 Git/SVN 的镜像:
$ subgit configure --layout auto $SVN_PROJECT_URL $GIT_REPO_PATH
SubGit version 3.3.13 ('Bobique') build #4426

Configuring writable Git mirror of remote Subversion repository:
    Subversion repository URL : svn://1.13.159.160/jh
    Git repository location   : /var/opt/gitlab/git-data/repositories/USER/REPOS.git

Peg location detected: r9 trunk
Fetching SVN history... Done.
Growing trees... Done.
Project origin detected: r1 trunk
Building branches layouts... Done.
Combing beards... Done.
Generating SVN to Git mapping... Done.

CONFIGURATION SUCCESSFUL

To complete SubGit installation do the following:

1) Adjust Subversion to Git branches mapping if necessary:
    /var/opt/gitlab/git-data/repositories/USER/REPOS.git/subgit/config
2) Define at least one Subversion credentials in default SubGit passwd file at:
    /var/opt/gitlab/git-data/repositories/USER/REPOS.git/subgit/passwd
   OR configure SSH or SSL credentials in the [auth] section of:
    /var/opt/gitlab/git-data/repositories/USER/REPOS.git/subgit/config
3) Optionally, add custom authors mapping to the authors.txt file(s) at:
    /var/opt/gitlab/git-data/repositories/USER/REPOS.git/subgit/authors.txt
4) Run SubGit 'install' command:
    subgit install /var/opt/gitlab/git-data/repositories/USER/REPOS.git
至此,Git/SVN 仓库之间的镜像已经设置成功,接着可以用 subgit install 命令来完成初始传输,也即让 SVN 的信息流向 Git:
$ subgit install $GIT_REPO_PATH
SubGit version 3.3.13 ('Bobique') build #4426

Translating Subversion revisions to Git commits...

    Subversion revisions translated: 9.
    Total time: 16 seconds.

INSTALLATION SUCCESSFUL

You are using SubGit in evaluation mode.
Your evaluation period expires on March 25, 2022 (in 6 days).

Extend your trial or purchase a license key at https://subgit.com/pricing
此后 SVN 仓库上的改动会自动同步至 Git 仓库,Git 仓库侧的改动会自动同步至 SVN 仓库。比如,目前 SVN 仓库的代码目录结构如下:
$ tree -d -L 2
.
├── branches
│   ├── 01
│   ├── 02
│   └── 03
├── tags
│   ├── v1.0.0
│   ├── v2.0.0
│   ├── v3.0.0
│   └── v4.0.0
└── trunk
    └── gitlab

11 directories
在 Git 仓库侧的 branch 和 tags 信息为:
$ git branch --all
  01
  02
  03
* master

$ git tag -l
v1.0.0
v2.0.0
v3.0.0
v4.0.0
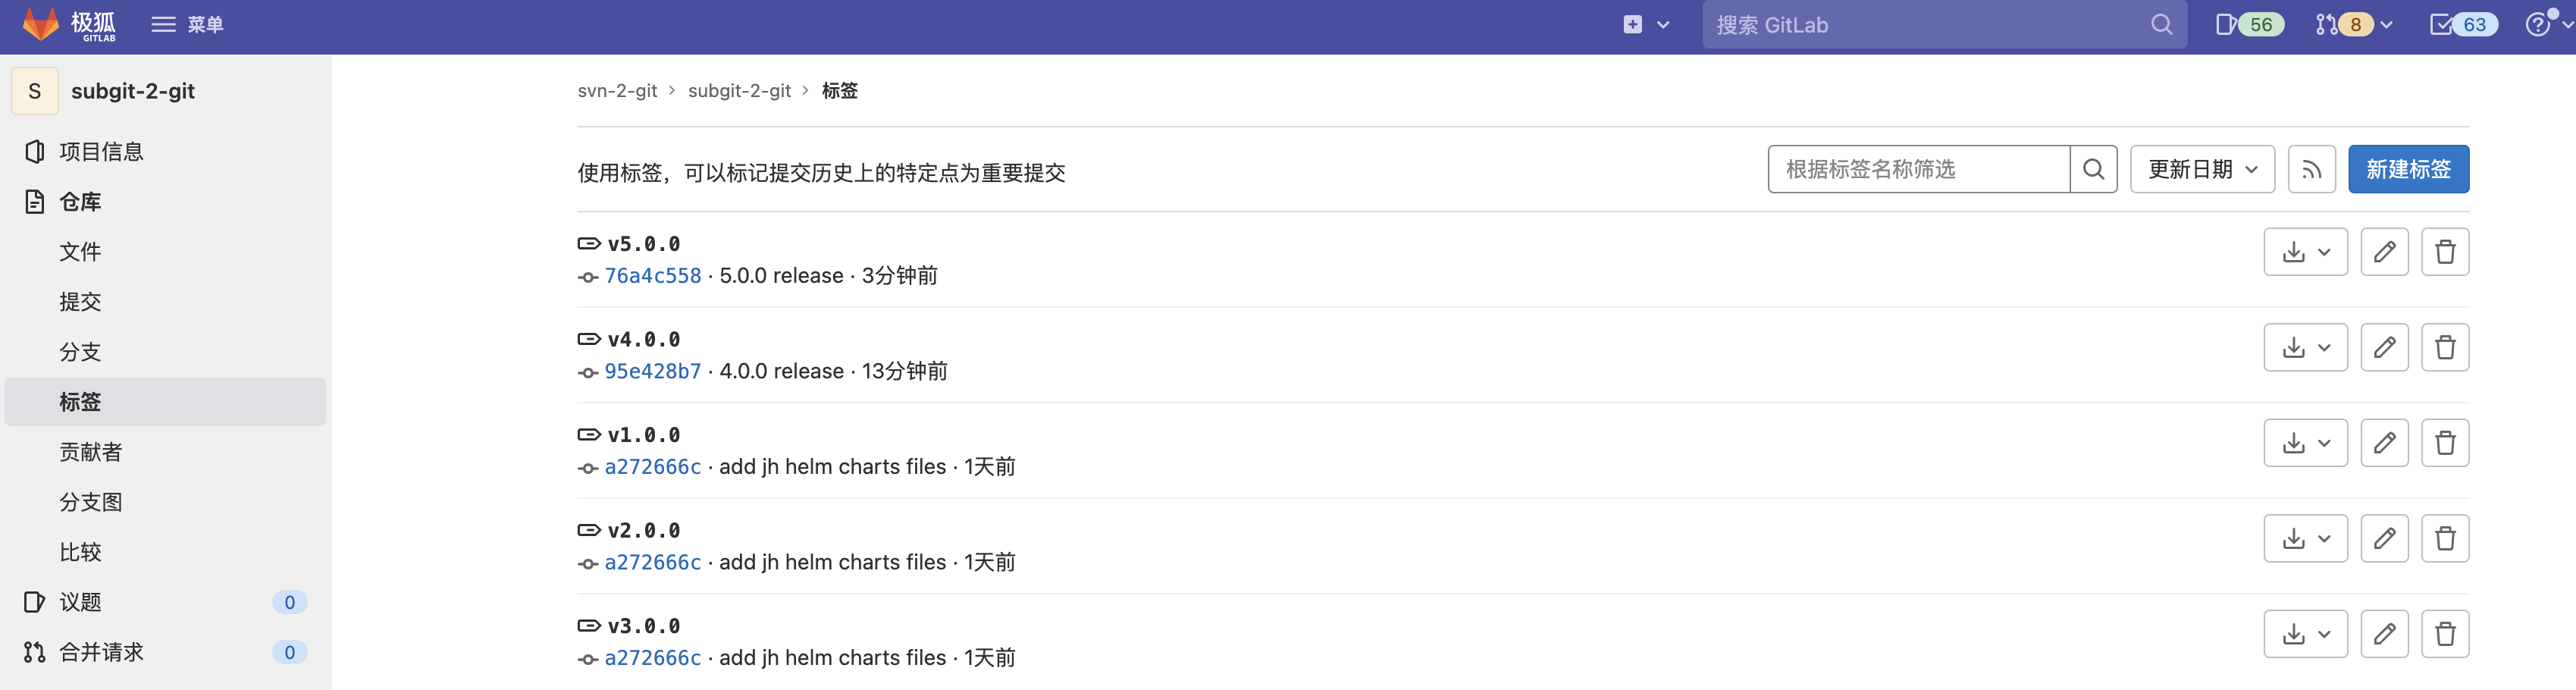
现在在 SVN 仓库侧,做一个修改,新建一个 tag:
$ svn copy svn://1.13.159.160/jh/trunk svn://1.13.159.160/jh/tags/v5.0.0 -m "5.0.0 release"
Committing transaction...
Committed revision 12.
接着查看 Git 仓库的 tag 变化:
$ git tag -l
v1.0.0
v2.0.0
v3.0.0
v4.0.0
v5.0.0
可以看到 v5.0.0 这个 tag 已经从 SVN 侧同步到 Git 仓库侧了,在极狐GitLab上,可以看到如下的 branch,tag 界面:
install 命令是让 svn 仓库和 Git 仓库保持同步,如果只是想一次性从 svn 切到 Git,则直接使用 import 命令即可。
针对极狐GitLab SaaS 的话,由于无法准确获知 GIT_REPO_PATH 的值(非 admin),则可以将 GIT_REPO_PATH 设置为 GIT_REPO_PATH=/var/opt/gitlab/git-data/repositories/USER/REPOS.git,在执行 subgit install 之后,直接使用 svn2git 的方式:添加远端仓库,然后将 branch 和 tag 直接 push 到极狐GitLab SaaS 的空库上面。