Visual Studio Code 安装与配置 Installation and Configuration
CodeRider支持Visual Studio Code,以插件形式提供服务。本安装步骤适用于macOS、Windows、Linux的Visual Studio Code中安装和使用CodeRider。
CodeRider supports Visual Studio Code and provides its services in the form of a plugin. This installation guide applies to installing and using CodeRider in Visual Studio Code on macOS, Windows, and Linux.
1. 环境要求 System Requirements
-
CodeRider需要登录极狐GitLab SaaS平台(免费注册体验用户或其他的SaaS用户)或自部署实例认证(企业自部署用户)方可使用。
-
操作系统版本:Windows 10/11,Linux(主流发布版)、macOS。
-
Visual Studio Code版本:1.85及以上版本。
-
CodeRider requires logging into the JH GitLab SaaS platform (free registration for trial users or other SaaS users) or authentication with a self-managed instance (enterprise self-managed users) to use.
-
Operating System Versions: Windows 10/11, Linux (major distributions), macOS.
-
Visual Studio Code Version: Version 1.85 and above.
2. 安装步骤 Installation Steps
-
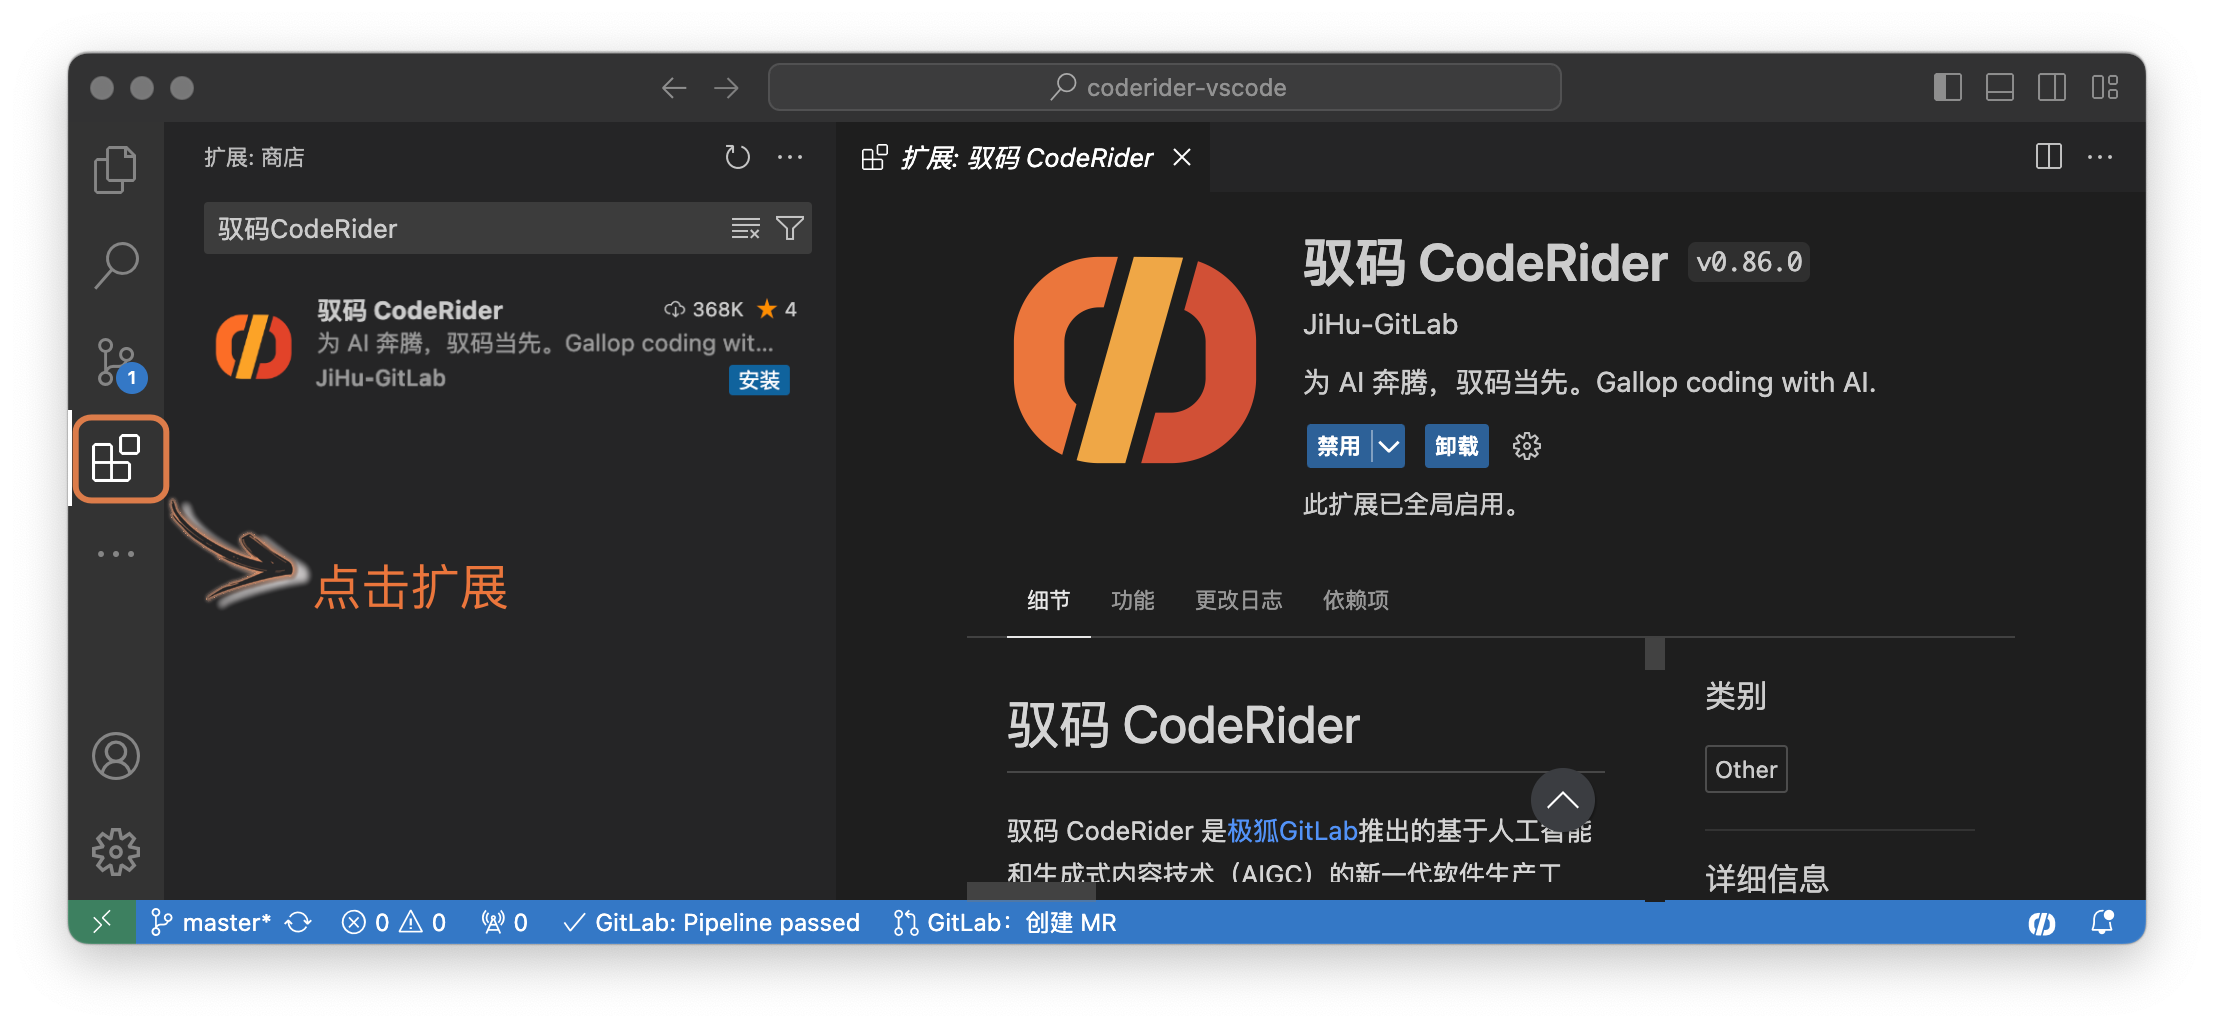
已安装Visual Studio Code的情况下,左侧导航栏单击扩展。
With Visual Studio Code already installed, click on “Extensions” in the left-hand sidebar.
-
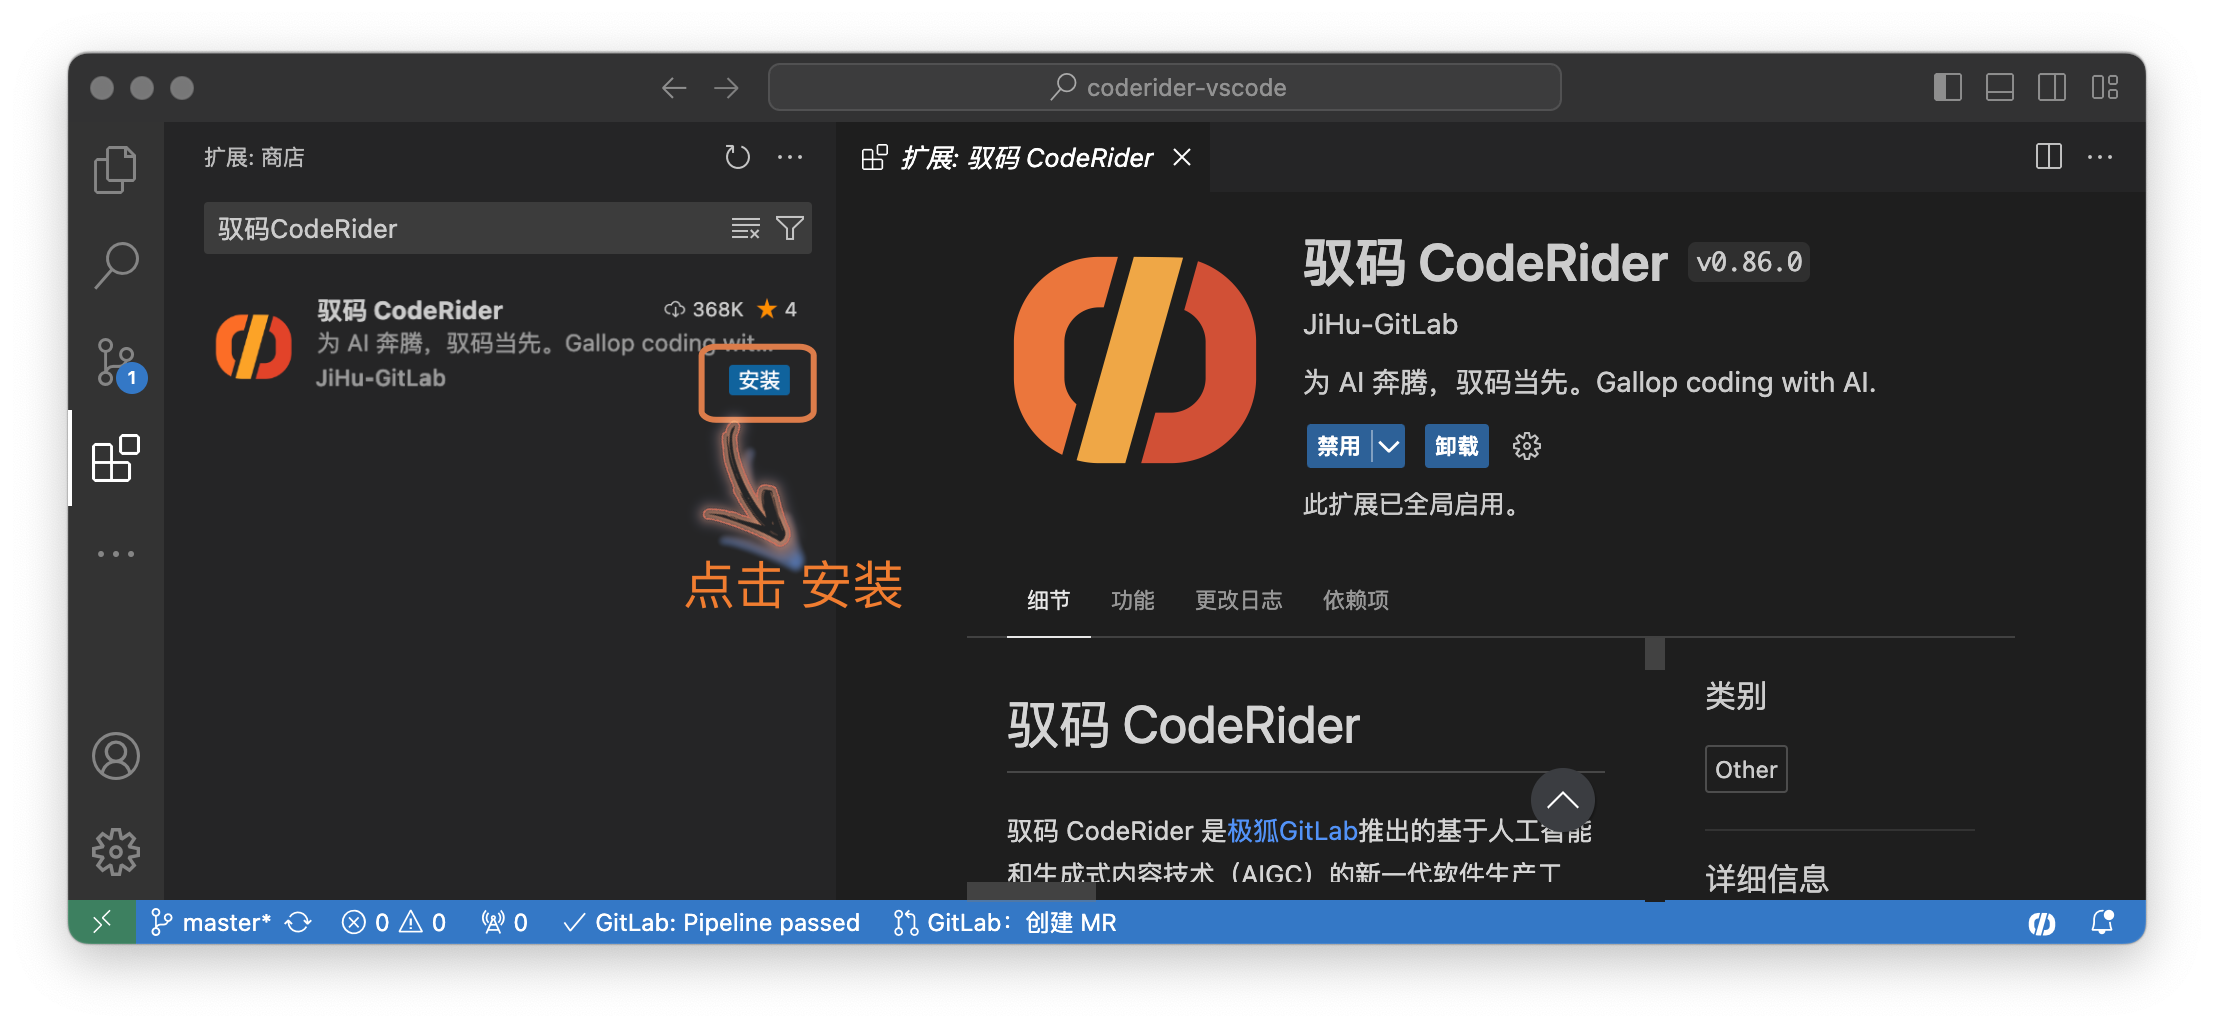
搜索“驭码CodeRider”,找到插件后点击安装。
Search for “CodeRider” in the search bar, and click to install the plugin once found.
-
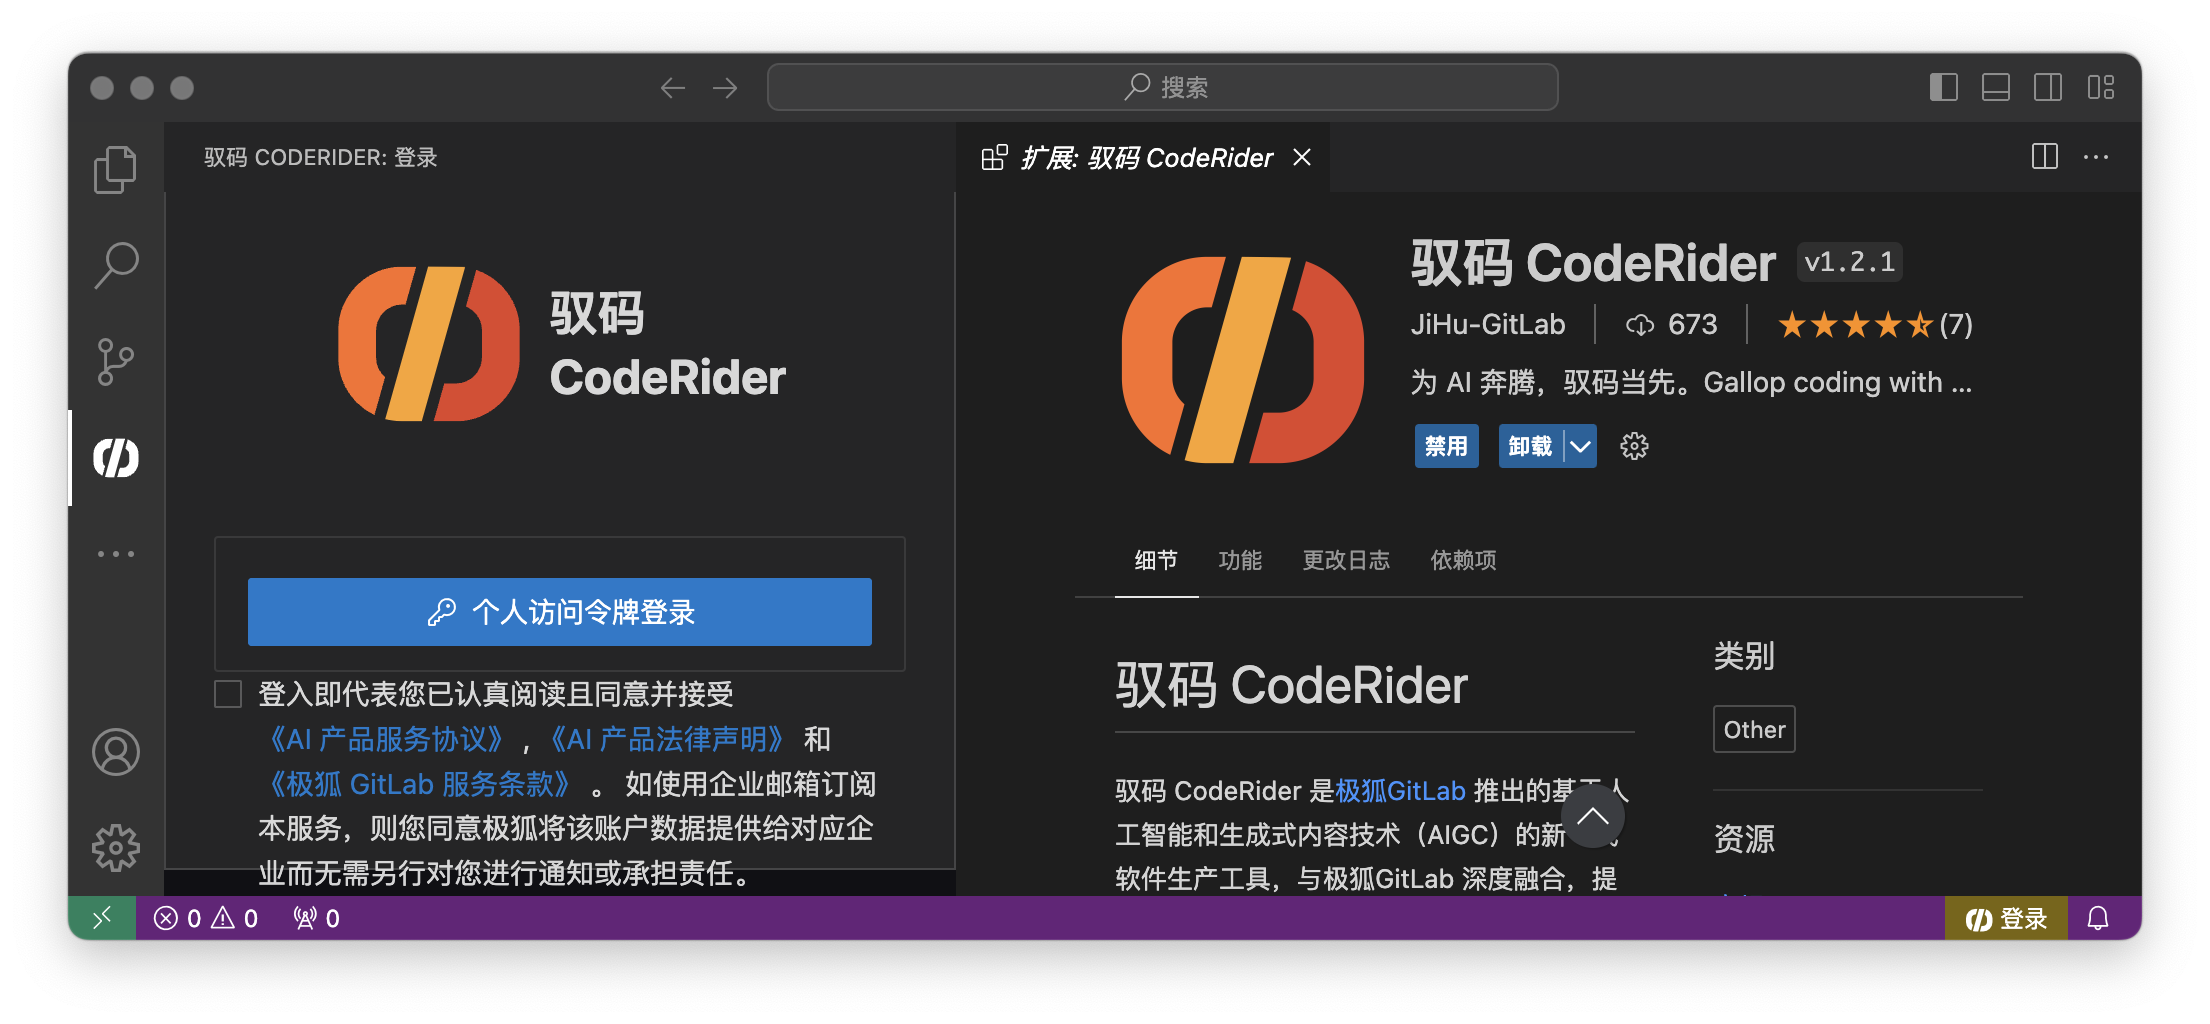
插件安装完成后,请先登录极狐GitLab 账号。
After the plugin installation is complete, please log in to your JH GitLab account first.
3. 登录 Login
打开 CodeRider 登录界面,输入驭码实例地址,并选择登录方式。(实例地址可联系企业管理员获得,中国大陆的 SaaS 用户实例地址为:https://coderider.jihulab.com/ ,默认无需修改)
3.1. 登录方式一:OAuth 登录
点击“OAuth登录”,同意相关服务协议后,跳转外部 GitLab 登录网站并授权,授权成功后返回插件即可登录成功。
3.2 登录方式二:个人访问令牌登录
点击“个人访问令牌登录”,同意相关服务协议后,跳转输入个人访问令牌(PAT)。输入正确的 PAT 后点击“登录”即可登录成功。
-
若您是首次登录,请点击“创建”个人访问令牌。
-
跳转界面后,在“个人访问令牌”栏中选择“添加新令牌”,设置个人访问令牌:
-
令牌名称:推荐使用默认名称;
-
到期时间:建议取消到期时间,取消后默认有效期为一年;或根据个人情况自定义到期时间;
-
选择范围:默认勾选 api 即可;
-
点击“创建个人访问令牌”,即可生成令牌。
-
-
注意:首次生成个人访问令牌后,建议用户自行保存供下次直接粘贴使用。
-
-
若您希望下次登录无需再次输入 PAT,请勾选“记住当前PAT”。
Enter the CodeRider instance host, and select the login mode.
Login Method 1: OAuth Login
Click “OAuth Login”, after agreeing to the relevant service agreement, jump to the external GitLab to log in to the website and authorize. After the authorization is successful, return to the plug-in to log in successfully.
Login Method 2: Personal Access Token Login
Click “Personal Access Token Login” and enter the Personal Access Token (PAT) after agreeing to the relevant service agreement. Enter the correct PAT and click “Login” to log in successfully.
-
If you are logging in for the first time, click “Create” Personal Access Token.
-
After jumping to the interface, select “Add new token” in the “Personal Access Token” column to set the personal access token:
-
Token name: The default name is recommended.
-
Expiration time: You are advised to cancel the expiration time. The default validity period is one year. Or customize the expiration time according to your personal situation.
-
Select range: api can be selected by default.
-
Click “Create Personal Access Token” to generate the token.
-
-
Note: After the personal access token is generated for the first time, you are advised to save it for the next time.
-
-
If you do not want to enter PAT again in the next login, select “Remember the current PAT”.
4. 用户配置
4.1 AI DevOps 助手配置 AI DevOps Assistant Configuration
点击“设置和支持”中的“设置”->“详细设置”,找到对应设置表单中的“GitLab: Custom Queries”,点击“在settings.json中编辑”。用户可以在对应的 settings.json 中自定义 CodeRider DevOps 界面呈现内容,包含项目史诗、议题、合并请求、代码片段、漏洞。
In “Settings and Support,” go to “Settings” -> “Detailed Settings,” then locate “GitLab: Custom Queries” in the settings form. Click on “Edit in settings.json.” This allows users to customize the content displayed on the CodeRider DevOps interface, including project epics, issues, merge requests, snippets, and vulnerabilities, within the appropriate settings.json file.
4.2 模型与知识库配置 Model and Knowledge Base Configuration
点击“设置和支持”中的“模型和知识库配置”,即可设置“是否下载本地模型”及“默认引擎”,请根据使用场景设置。
推荐配置:
-
当开发者设备满足一定的配置要求时,开发者可选择“下载本地模型”,从而感受 CodeRider 本地模型推理的流畅体验。
以下是桌面个人电脑或者笔记本电脑的推荐配置:
-
Intel/AMD CPU + 英伟达 GPU 卡(显存8GB及以上)
-
Intel/AMD CPU + AMD GPU 卡(显存8GB及以上)
-
Apple Silicon M1/M2/M3(统一内存16GB及以上)
-
操作系统:Windows 10/11、Linux(主流发布版)、MacOS
-
磁盘空间:不低于50GB硬盘空间,固态硬盘性能更佳
-
-
此外,开发者可根据实际研发场景选择“云端模型”,感受云端算力推理带来的流畅体验。“云端模型”方案支持开发者灵活选择开发设备。
注:当选择“下载本地代码补全模型”后,稍等片刻插件会提示确认下载“端侧组件”、“补全模型”。因模型文件较大,需等待片刻,右下角会显示下载进度。
当选择“下载本地对话模型”后,在对话框选择“本地模型”时,插件会提示确认下载“端侧组件”(如未下载)、“对话模型”。因模型文件较大,需等待片刻,右下角会显示下载进度。
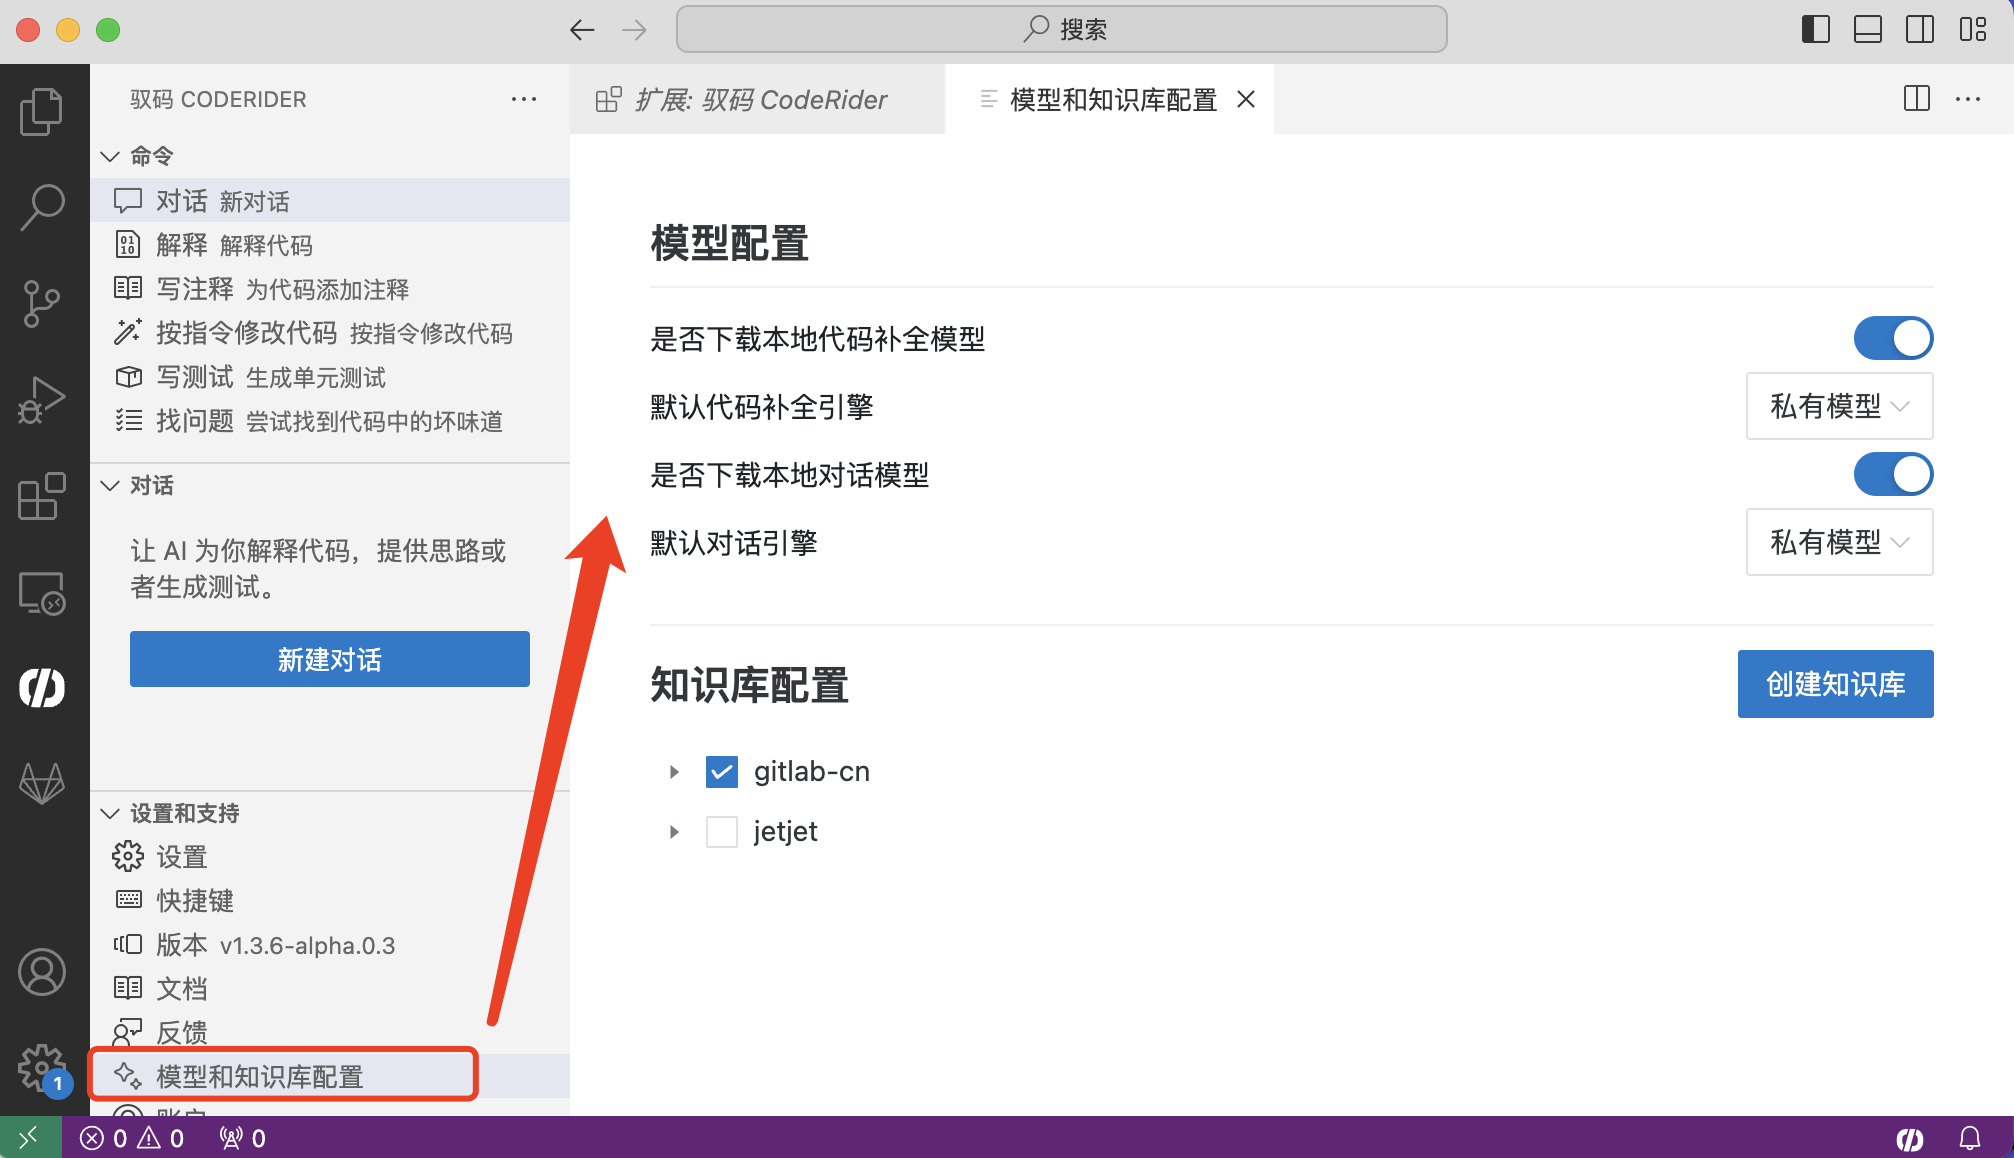
Click on “Model and Knowledge Base Configuration” under “Settings and Support” to set up “Download Local Model” and “Default Engine.” Please configure these settings according to your usage scenario.
Recommended Configuration:
-
When the developer’s device meets certain configuration requirements, they can choose to “Download Local Model” to experience the smooth performance of CodeRider’s local model inference.
This is the recommended configuration for desktop or laptop computers.
-
Intel/AMD CPU + NVIDIA GPU (with 8GB VRAM or more)
-
Intel/AMD CPU + AMD GPU (with 8GB VRAM or more)
-
Apple Silicon M1/M2/M3 (Unified memory 16GB or more)
-
Operating System: Windows 10/11, Linux (major distributions), MacOS
-
Disk space: Not less than 50GB of hard disk space, with solid-state drive (SSD) performance recommended
-
-
Additionally, developers can choose the “Cloud Model” based on their actual development scenario to experience the smooth performance offered by cloud computing inference. The “Cloud Model” solution supports flexible selection of development devices.
Note: When selecting “Download Local Code Completion Model,” please wait for a moment; the plugin will prompt you to confirm the download of the “Client-Side Component” and the “Completion Model.” Since the model files are large, please wait for a while; the download progress will be displayed in the bottom right corner.
When selecting “Download Local Chat Model,” and choosing “Local Model” in the dialog box, the plugin will prompt you to confirm the download of the “Client-Side Component” (if not already downloaded) and the “Chat Model.” Since the model files are large, please wait for a while; the download progress will be displayed in the bottom right corner.
5. 登出 Logout
点击插件界面“设置和支持”中的“账户”,即可选择“登出”。
Click on “Account” in the “Settings and Supports” section of the plugin interface to select “Logout.”